> For the complete documentation index, see [llms.txt](https://docs.omnileads.net/llms.txt). Markdown versions of documentation pages are available by appending `.md` to page URLs; this page is available as [Markdown](https://docs.omnileads.net/english/instagram-settings/instagram-accounts.md).
# Instagram accounts
## Adding an Instagram account
Assuming that the Meta Integration was performed correctly (see section [Integración con Instagram](broken://pages/f8etqrYT3aFgsLi1LQ4n)), It is now possible to connect an Instagram business account to OMniLeads from the Connections Menu -> Meta/Facebook -> Instagram.
As soon as we click on "+New", a Wizard will start where in simple steps we will define:
* Account Name and Description: We choose the name and a brief description of the Business asset.
* Verification token: the session token to be used, defined in the section of [Configuración de Integración](#incorporacion-de-una-cuenta-de-instagram).
* Access token: Access token created for OMniLeads from the previous section.
* Page ID: A unique ID for the landing page as a resource. This information is provided by Facebook Developers when you add the asset.
* AppID: Application ID given by Meta in the Facebook Developers panel.
* Instagram User ID: Instagram user identifier.
* Instagram Username: username provided when creating the business account.
## Connection Details
The last section comprises the Connection Data, where the Time Group and routing strategy are defined:
* Time Group: Allows you to select a time group to which the service and referral strategy should be adjusted. This time group must be created in the Resources -> Time Groups menu. If a message is received outside the defined service hours, the orchestrator will automatically send the configured Out of Hours message.
* Welcome, After Hours and Farewell Messages: allow you to select message templates that were previously created in the Resources Menu -> Message Templates.
## Referral Destinations
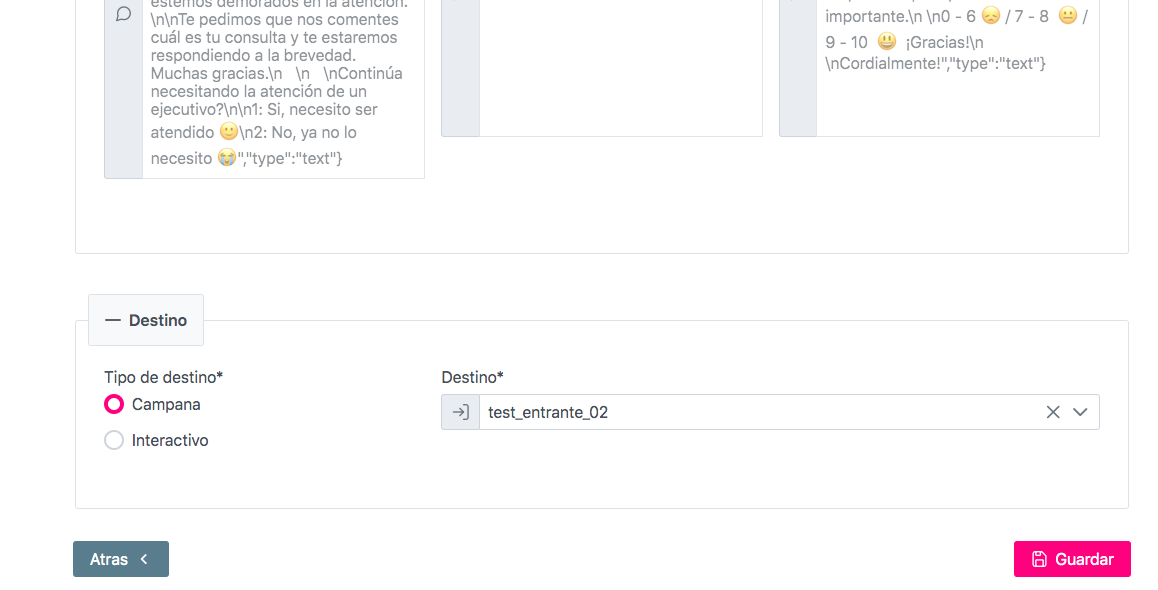
Finally, in the Destination section, the referral strategy is defined:
* Direct: Every lead/prospect/customer who starts a conversation from the Instagram business account within the configured Time Group will receive the automatic Welcome Message and will be referred to the General Inbox of the campaign selected in the Destination field, where agents can assist them from the Instagram Messenger Toolbar.
* Interactive/Bot: Every lead/prospect/customer who initiates a conversation from the business Instagram account within the configured Time Group will receive an automated Welcome Message with routing options. Depending on the option selected, they will be routed to the General Inbox of the corresponding campaign. There, agents can assist them from the Instagram Messenger Toolbar.
To activate the Social Network channel in a campaign, you can follow the steps in the section on [Campañas de Instagram](broken://pages/owFtDClyfwa7M2qoKYr2). To see an agent in action, you can visit the section of [Mensajes de Instagram](broken://pages/BCILzrzK2PLTmj63mSq5).
---
# Agent Instructions
This documentation is published with GitBook. GitBook is the documentation platform designed so that both humans and AI agents can read, navigate, and reason over technical content effectively. Learn more at gitbook.com.
## Querying This Documentation
If you need additional information that is not directly available in this page, you can query the documentation dynamically by asking a question.
Perform an HTTP GET request on the current page URL with the `ask` query parameter, and the optional `goal` query parameter:
```
GET https://docs.omnileads.net/english/instagram-settings/instagram-accounts.md?ask=&goal=
```
`ask` is the immediate question: it should be specific, self-contained, and written in natural language.
`goal` is optional and describes the broader end goal you are ultimately trying to accomplish on behalf of the user. GitBook uses it to tailor the answer towards what is most useful for that goal.
The response will contain a direct answer to the question and relevant excerpts and sources from the documentation.
Use this mechanism when the answer is not explicitly present in the current page, you need clarification or additional context, or you want to retrieve related documentation sections.