Manual Campaign
Última actualización
Última actualización
To create a new manual campaign, go to the Campaigns -> Manual Campaigns -> New Campaign menu. The creation process consists of a 2-screen wizard.
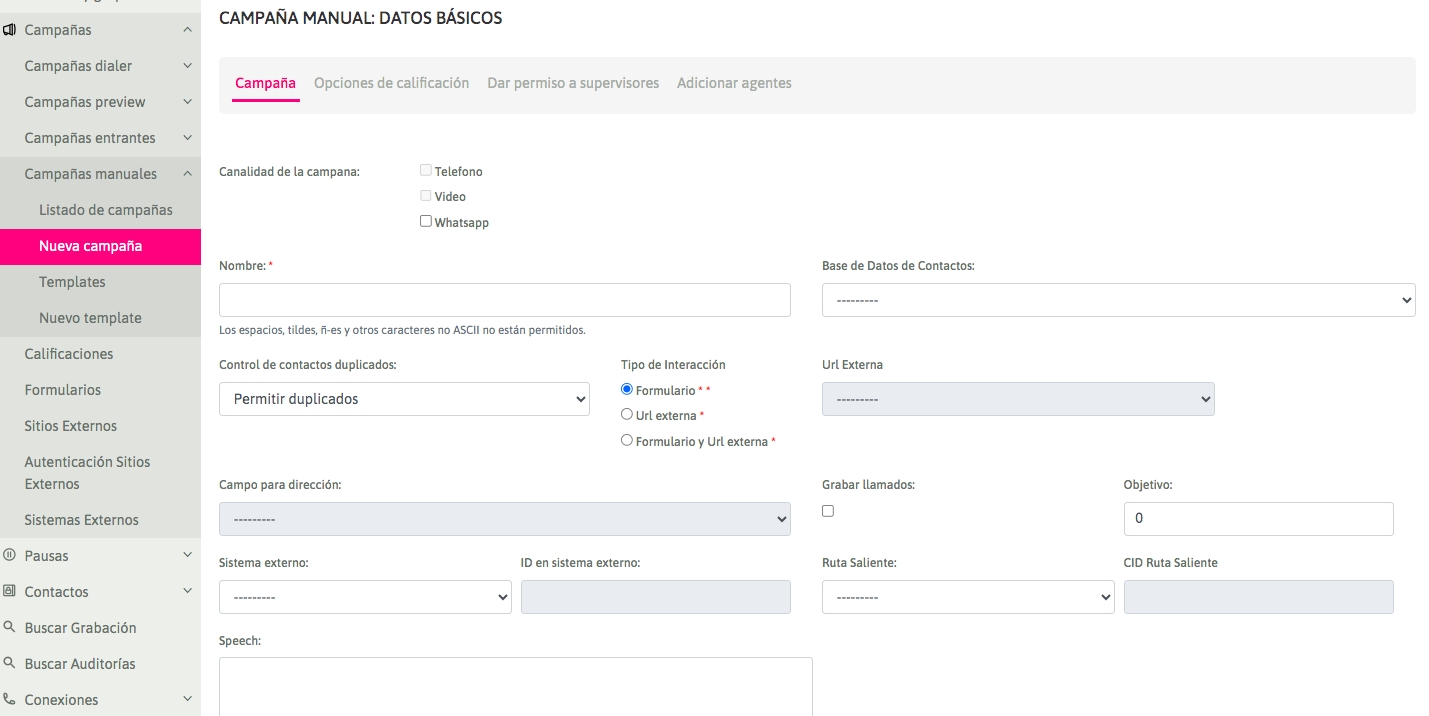
The first screen invites us to indicate a series of campaign parameters, as shown in the following figure:
Figure 1: Campaign parameters
Campaign channel: these are the channels that will be accepted in the campaign. Visit the WhatsApp Business section to correctly configure the
WhatsApp channel. Name: Name of the campaign.
Contact database: Used to display extra data to the phone, when making a call to a campaign contact.
Duplicate control: Used to control duplicate records in databases. The options are: Allow Duplicates / Avoid Duplicates.
Interaction type: Indicates whether the campaign will operate with OMniLeads forms, with the invocation to a CRM (External URL) for each connected call, or with both methods at the same time.
External URL: If you have selected the invocation to an external URL in each call, here you indicate which of the defined CRMs should invoke the campaign.
Address field: If you have activated the integration with Google API, this option allows you to select the database field that will serve as the Contact's Geolocation. The associated map will be included within the tab in the Agent Console.
Record calls: Enable the recording of all calls made by the campaign.
Objective: This is defined as the number of positive actions expected for the campaign. Campaign monitoring shows the percentage of progress of the campaign in real time with respect to the defined objective.
External system: This is where the external management system that would execute "click to call" on the campaign is assigned, if desired.
ID in external system: This field must contain the ID that the campaign has within the external management system from which the "click to call" or "qualification requests" will arrive.
Outbound route: An existing outbound route is assigned to a campaign.
Outbound route CID: This field must contain the CID assigned for an existing outbound route to a campaign. Speech: The campaign speech to be displayed in the agent console in the campaign calls.
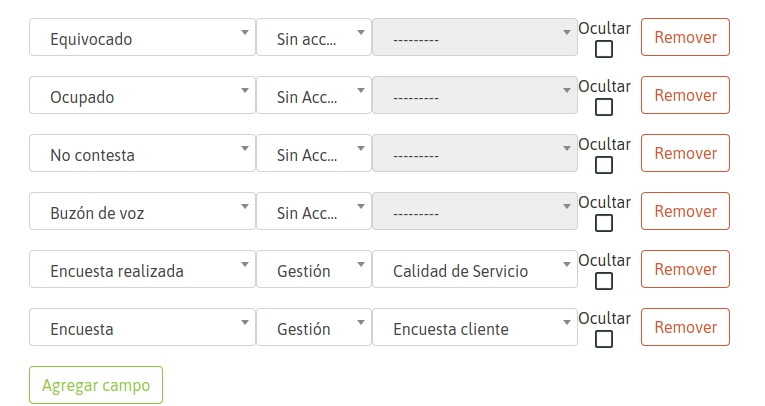
Note The subject of the contact base in manual campaigns (and also incoming ones) poses a flexible scenario, since it is optional to assign a contact base to this type of campaign. In this case, the contact base is used if we want that every time an agent dials a phone that corresponds to a contact in the base, the data (extra columns to the phone) of the same can be recovered. In addition, the fact of working with a contact base in a manual campaign allows to rate each contact called. In the second screen, the required ratings must be assigned so that the agents can classify each call made to the contact. IMPORTANT: The Management Form previously selected in the Rating Options Wizard cannot be changed, if the Management Rating has already been used in the campaign. As can be seen in the following figure, in our example we handle 2 ratings that trigger 2 different forms:
Figure 2: Campaign
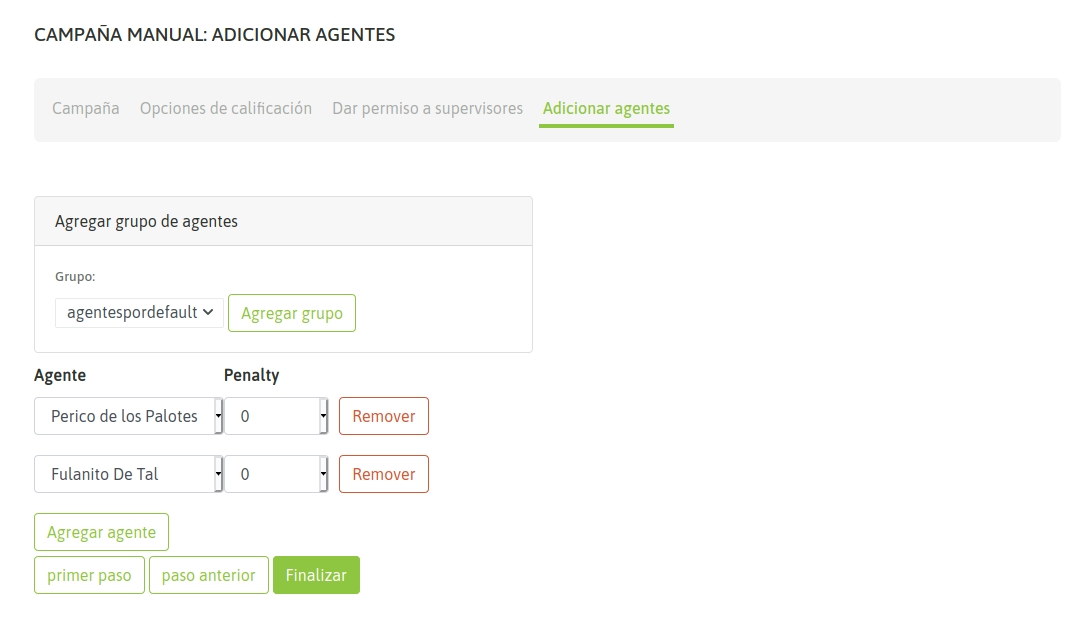
Ratings In the following steps, supervisors and agents can be added to our campaign:
Figure 3: Agent Assignment
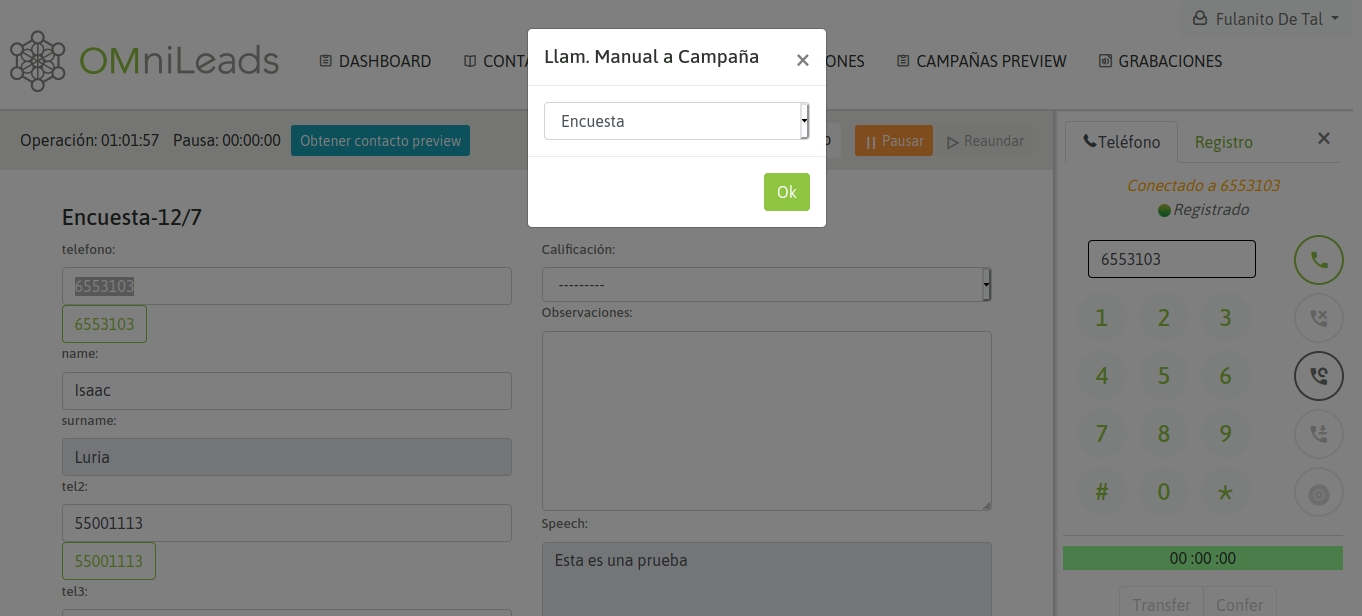
Finally, we have our new manual campaign. When an agent assigned to it logs into the platform and starts dialing calls from his webphone, the system will allow him to select the campaign to which he will assign each manual call generated from the webphone, as shown in the following figure:
Figure 4: Manual call selection to campaign
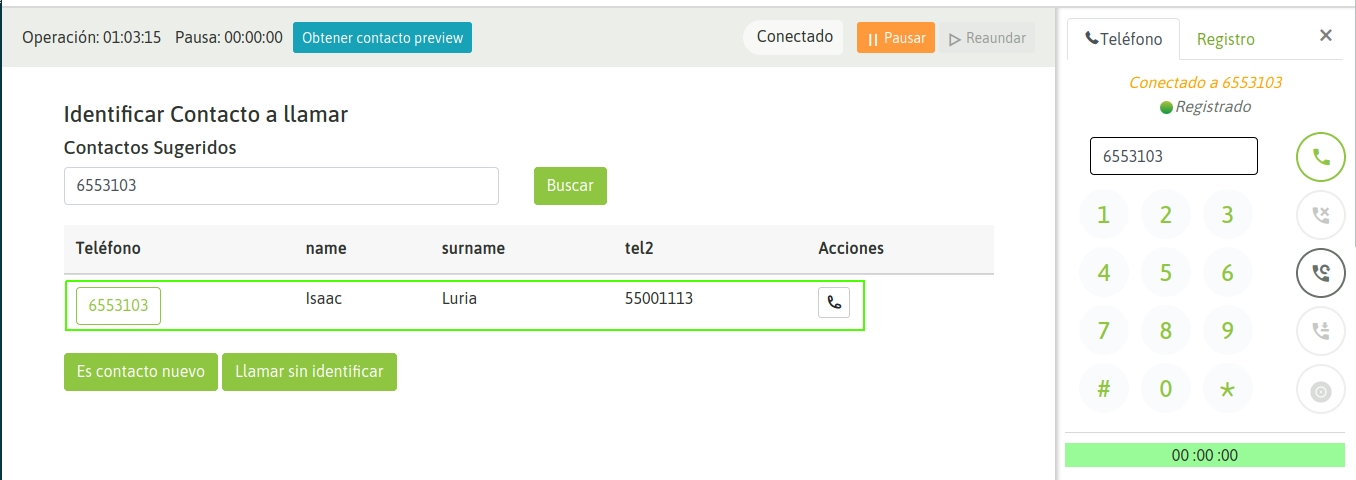
When an agent is online and dials a phone number corresponding to a contact in the campaign database, the contact whose phone number matches the phone number dialed by the agent is displayed as a contact to select and its data is displayed on the agent screen. It is also possible to generate a new contact. The agent can then either confirm that the call is being sent to the listed contact or create a new contact and dial it. The contact's data (in addition to the phone number) is displayed on the agent screen:
Figure 5: Contact selection
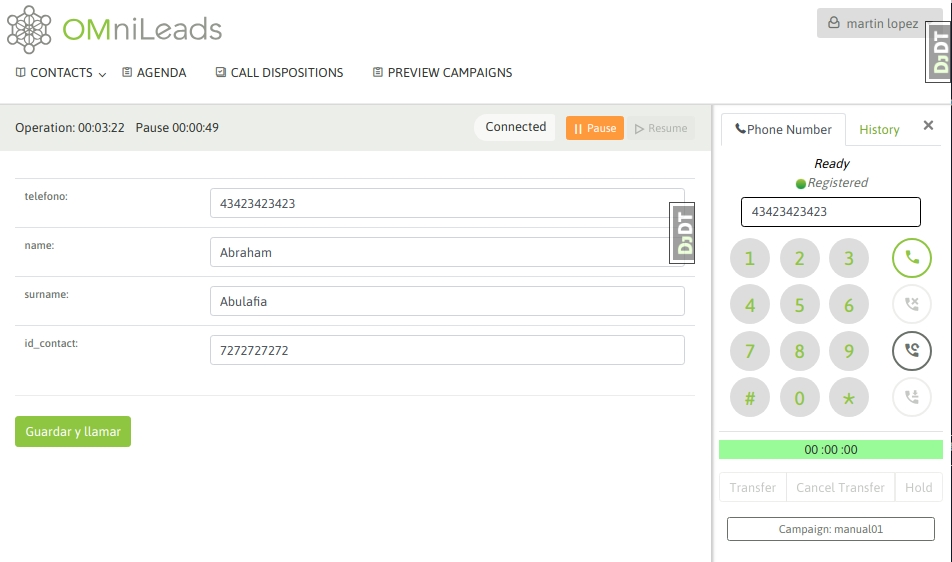
If you select to call the listed contact, then the contact's data is displayed on the screen, as shown in the following figure:
Figure 6: Contact information
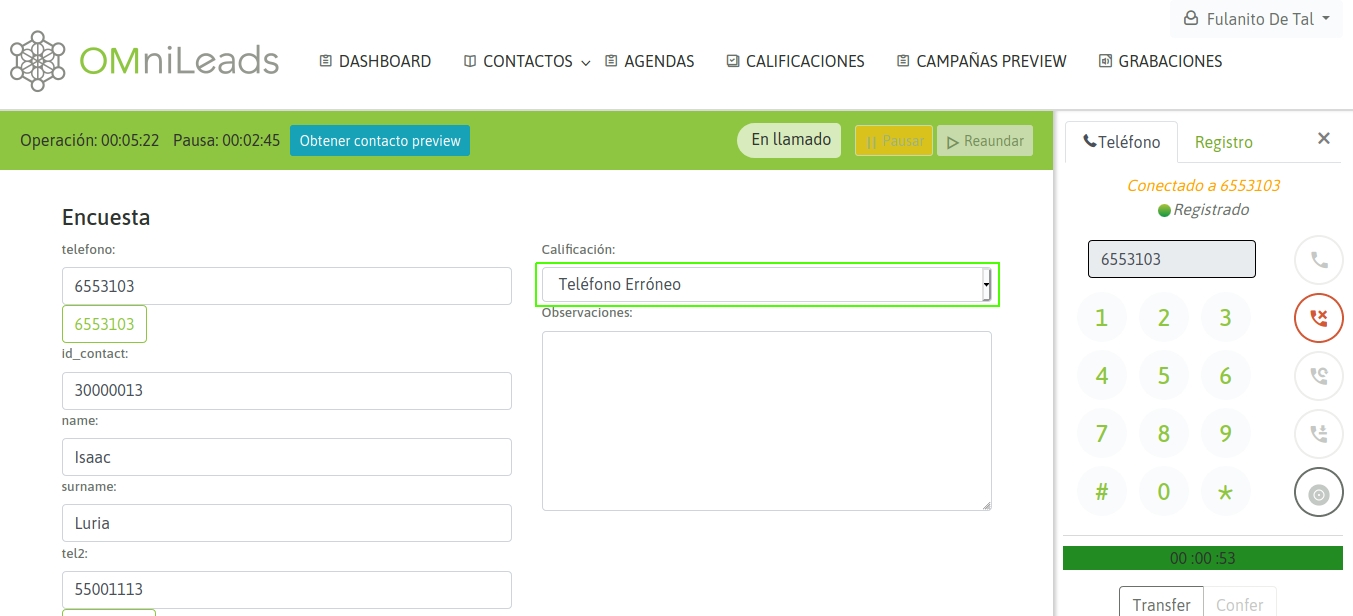
In this way, the agent can assign a rating to the called contact, as shown in the following figure:
Figure 7: Contact rating
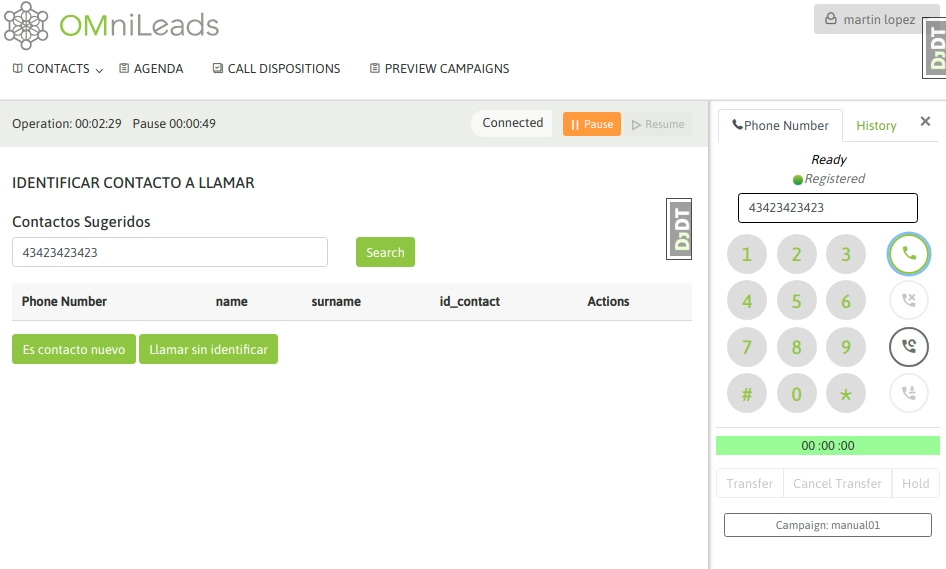
On the other hand, if the dialed phone number does not correspond to any contact in the database, then the system allows the agent to search for the contact in the database or generate a new contact. In the case of a campaign without a contact database, then each call made by an agent implies that the contact associated with the dialed call is generated, as shown in the following 2 figures:
Figure 8: Adding a new contact to the database of campaign 1
Figure 9: Adding a new contact to the campaign database 2
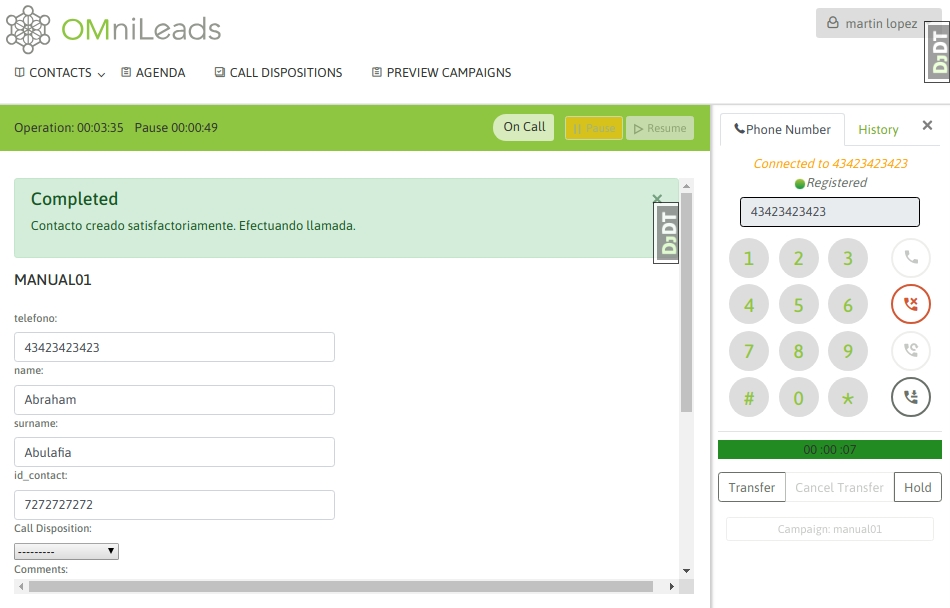
So, when dialing a number that does not return a contact, the agent will go through a view where he must first add the contact as a record in the campaign database and then dial. Finally, the new contact and the option to classify the call with a rating are displayed, as shown in the following figure:
Figure 10: New contact called
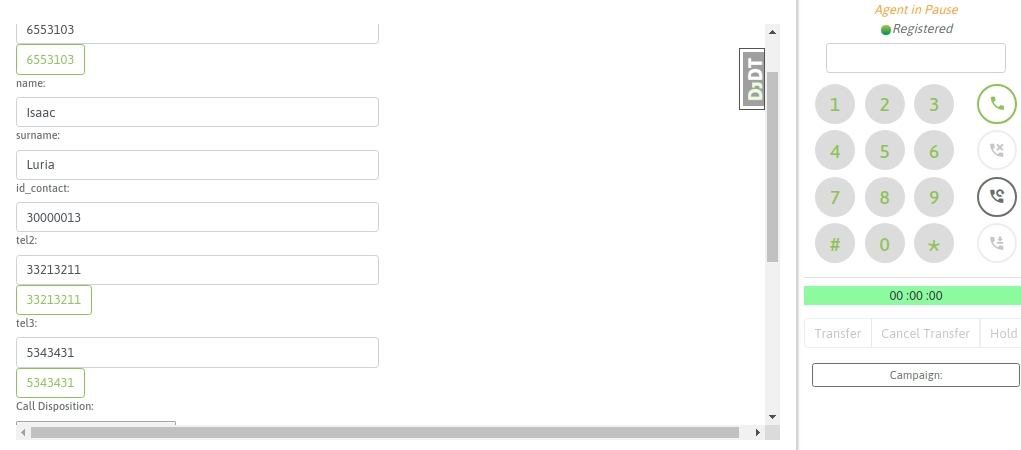
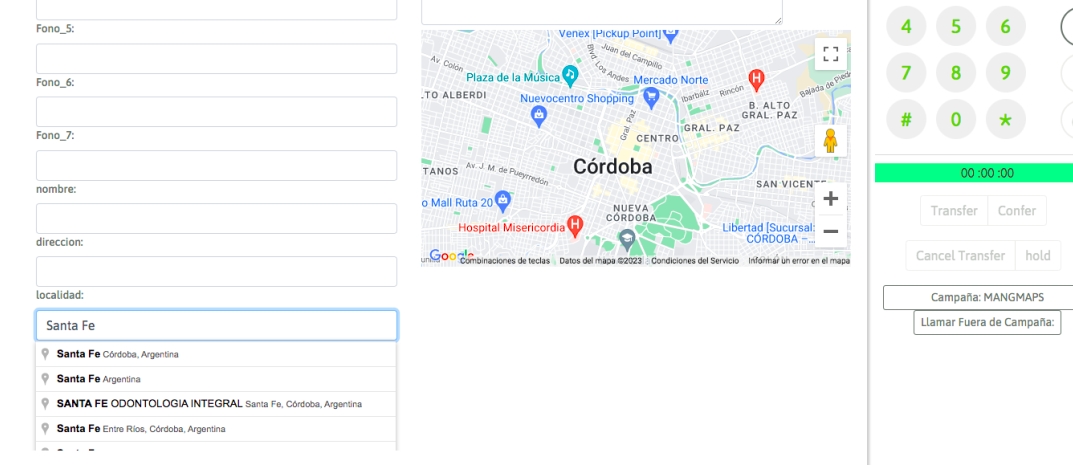
As we know, OMniLeads supports that each contact in a database has “n” contact phone numbers, so that if the contact is not found at its main number (the first one in our database CSV file), it can be contacted at the other numbers. In this case, each phone number (which we indicate in the database upload) is generated as a link within the contact data presented on the agent screen. Clicking on this link triggers a call to the contact’s extra phone number. The following figure shows this scenario:
Figure 11: Multi-number contact base
Therefore, the agent can try to contact all the numbers available as a "link" in the contact's file, until finally qualifying and moving on to a new one.