Inbound Campaign
Creating a new campaign
To create a new campaign, go to the menu Campaign -> Incoming Campaigns -> New Campaign. Complete the first screen of the wizard, as shown in the following figure:
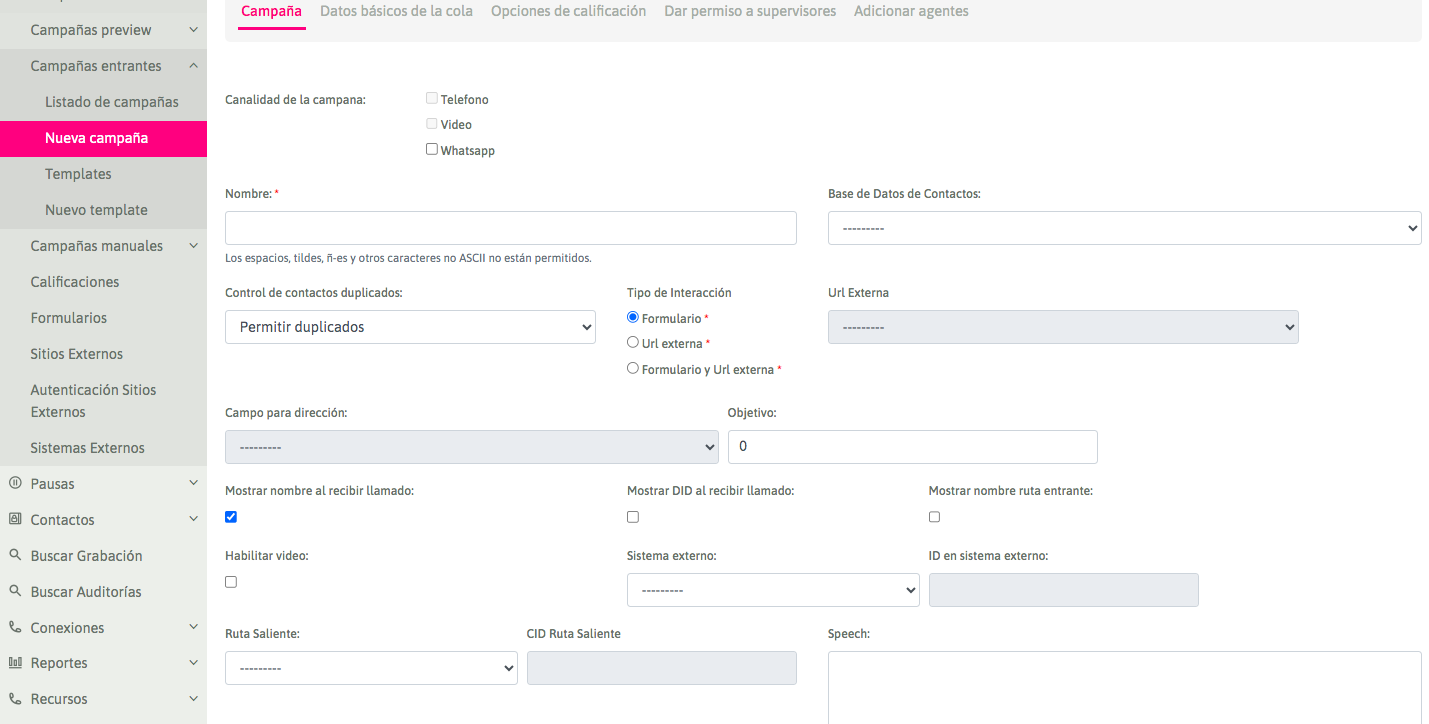
Figure 1: Campaign parameters
Campaign Channel: These are the channels that will be accepted in the campaign. Visit the Whatsapp Business section to properly configure the Whatsapp channel.
Name: Name of the campaign.
Contact Database: Optional field. Used to display data from the phone number that makes the incoming call to the system.
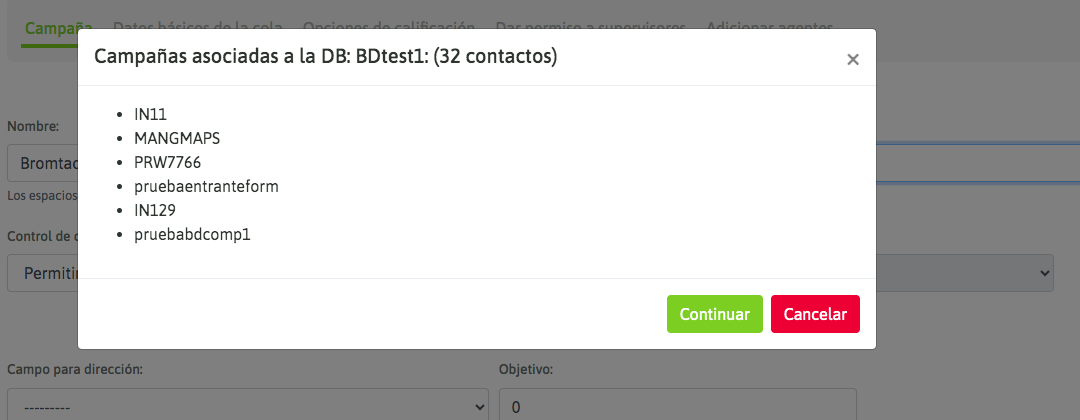
It is important to mention that if a Database already in use in another Campaign is selected in this view, the Administrator will receive an Information Banner alerting them about this situation. If they click on Continue, the call transfers executed by the Agent will transport the contact information to the transferred destination.
Duplicate Control: Used to control duplicate records in databases. Options are: Allow Duplicates / Avoid Duplicates.
Interaction type: Indicates whether the campaign will operate with OMniLeads forms, with the invocation to a CRM (External URL) for each connected call, or with both methods at the same time.
External URL: If you have selected to invoke an external URL in each call, this indicates which of the defined CRMs should invoke the campaign.
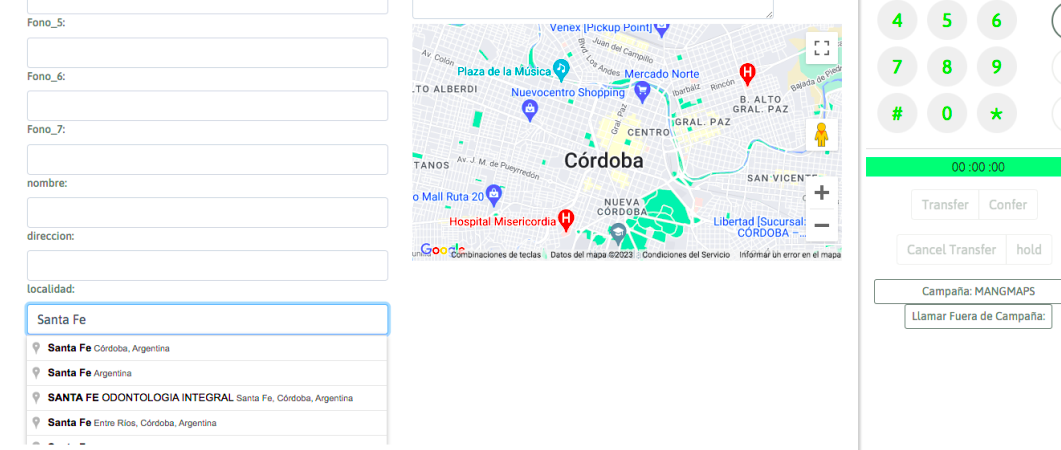
Address Field: If you have activated the integration with Google API, this option allows you to select the database field that will serve as the Contact's Geolocation. The associated map will be included within the record in the Agent Console.
Show Incoming Route Name: This option enables the display of the name of the Incoming Route through which the call is entering.
Show DID on Call Reception: This option enables the display of the DID (Direct Inward Dialing) of the Incoming Route through which the call is entering.
Show Name on Call Reception: This option enables the display of the campaign name through which the call is entering.
Objective: Defined as the number of positive interactions expected in the campaign. During campaign supervision, the real-time campaign progress percentage is shown against this defined objective.
Speech: The campaign speech to be displayed in the agent's console during campaign calls.
Outgoing CID route: This field must contain the assigned CID for an existing outbound route to a campaign.
Outgoing route: An existing outbound route is assigned to a campaign.
External system ID: This field must contain the ID that the campaign has within the external management system from which "click to call" or "contact rating requests" will come.
External system: Assign the external management system that would execute "click to call" on the campaign if desired.
Enable video: Enable video if available.
The topic of the contact database in inbound (and also manual) campaigns presents a flexible scenario since assigning a contact database to this type of campaign is optional. In this case, the contact database is used if we want to retrieve the data of each contact who makes an inbound communication based on their "caller ID". This is possible if the phone number they are calling from is registered within the contact database associated with the campaign.
Next, we proceed to create the incoming campaign:
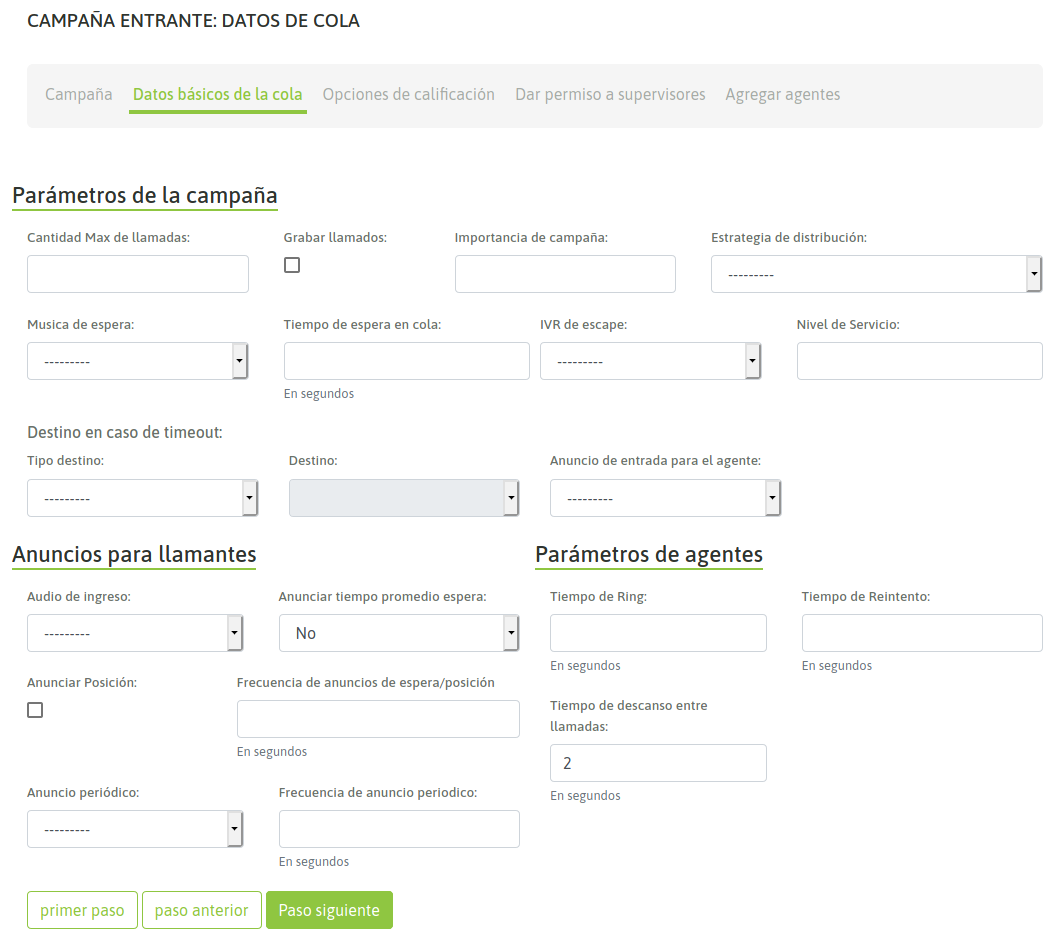
Figure 2: Campaign parameters
On-hold Music: Indicates the playlist that the customer will listen to when their call is on hold.
Distribution Strategy: Method of call distribution that the campaign will use with the agents. For outbound campaigns, RRMemory is recommended.
Campaign Priority: A linear parameter on a scale from 1 to 10, which indicates the importance of the calls from this campaign compared to others. It sets priorities for agents working on multiple campaigns simultaneously. If the value is left at "0" (default), equity with other campaigns is maintained.Record Calls: Select this checkbox if call recording is required.
Maximum Call Queue: This is the number of calls allowed to be in the waiting queue. Beyond this number, the call will be sent to the "failover" action.
Timeout Destination: The destination to which expired calls (exceeding the associated wait time) will be sent.
Service Level: A parameter to measure how many calls were answered within the specified time frame. The value is expressed in seconds.
Escape IVR: An IVR destination that the user can choose to "escape" to during the wait time. This parameter is related to the periodic announcement, as the latter would play the message guiding the user to escape to the specified IVR destination.
Queue Wait Time: The time (in seconds) that the contacted call will remain in the queue, waiting for an agent to become available to connect the call.
Frequency of wait/position announcements: The time (in seconds) of wait or position for an announcement frequency.
Announce position: Announce the caller’s position in the queue.
Retry time: The time (in seconds) the call will remain in the waiting queue before trying to connect it with another available agent.
Ring time: The amount of ring time the campaign uses to try to contact the incoming call to an agent. This parameter is relevant only if the agent is not working in a group configured with the Auto-attend inbound calls mode.
Announce average wait time: Allows the user to specify the average time the caller will have to wait to be attended.
Inbound audio: Allows defining if any audio will be played on the incoming call upon entering the waiting queue of our campaign. For it to be available in the dropdown selector, the file must be previously uploaded from the menu Telephony > Audios > Custom audios.
Agent entry announcement: Audio that is played to the agent when they receive an incoming call.
Frequency of periodic announcement: Number of seconds between each playback of a periodic announcement.
Periodic announcement: We can select an audio from our repository to play as a periodic announcement during the call on hold.
Rest time between calls: The rest time (in seconds) each agent has between each successful call.
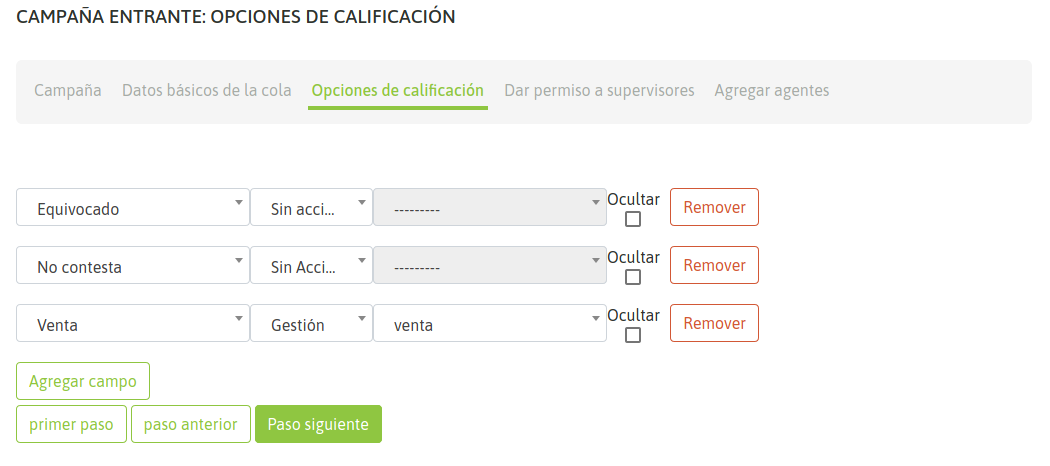
IMPORTANT: The Management Form previously selected in the Rating Options Wizard cannot be changed if the Management Rating has already been used in the campaign. In the next configuration stage, you must assign the ratings required by the campaign so that agents can rate each contact call.
The "Ring Time" and "Retry Time" parameters are ineffective for calls received by agents whose agent group is configured with the auto-attendance attribute for incoming calls or for campaigns that have this option enabled in "Agent Settings".
Note
In the next step, we add supervisors to the campaign.
**Figure 3: Campaign Ratings
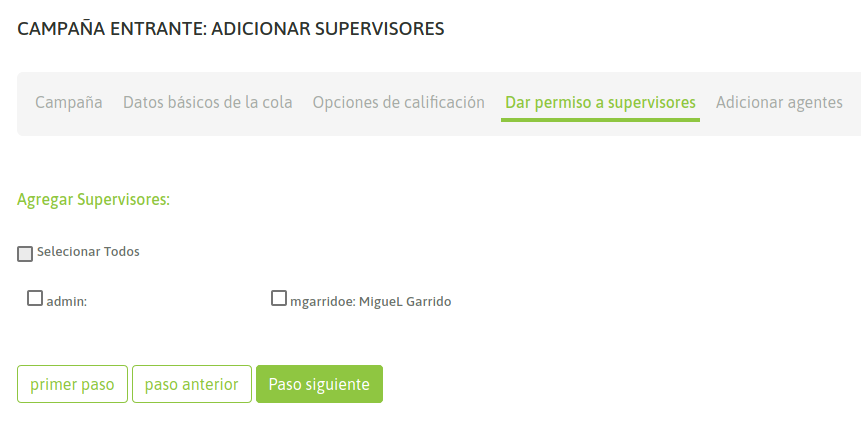
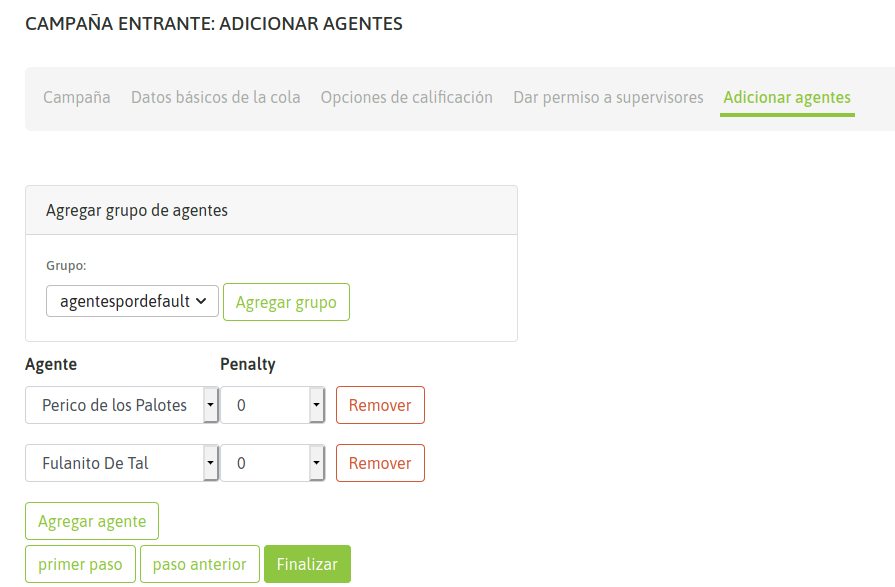
Finally, the agents can be assigned to the campaign:_Figure 4: Supervisor Assignment
In the rest of the chapter, everything about the routing of calls from trunk links to our incoming campaigns is detailed.
Ringing vs. automatic answering of incoming calls
The behavior of the agent's webphone when faced with a call from an incoming campaign can be:
Automatic Call Handling. This behavior implies that each incoming call sent to an agent is automatically answered by the agent's phone, notifying the agent with a "beep" before finally connecting them with the other party of the call.
Normal Ringing occurs with a duration associated with the "Ring Time" parameter present in the creation of the incoming campaign. During this time, the agent's phone notifies of the incoming call, waiting for the agent's action to either answer or not the call.
This behavior depends on the "Agent Group" level settings of the agent linked to the incoming campaign (see figure 6) or on the agent settings specified for the campaign (see figures 7 and 8). So if the group or campaign has automatic answering of incoming calls enabled, the agent will respond in this way to each incoming call from any campaign, rendering the "Ring Time" and "Retry Time" parameters ineffective, as mentioned in "Note 2" of this section.
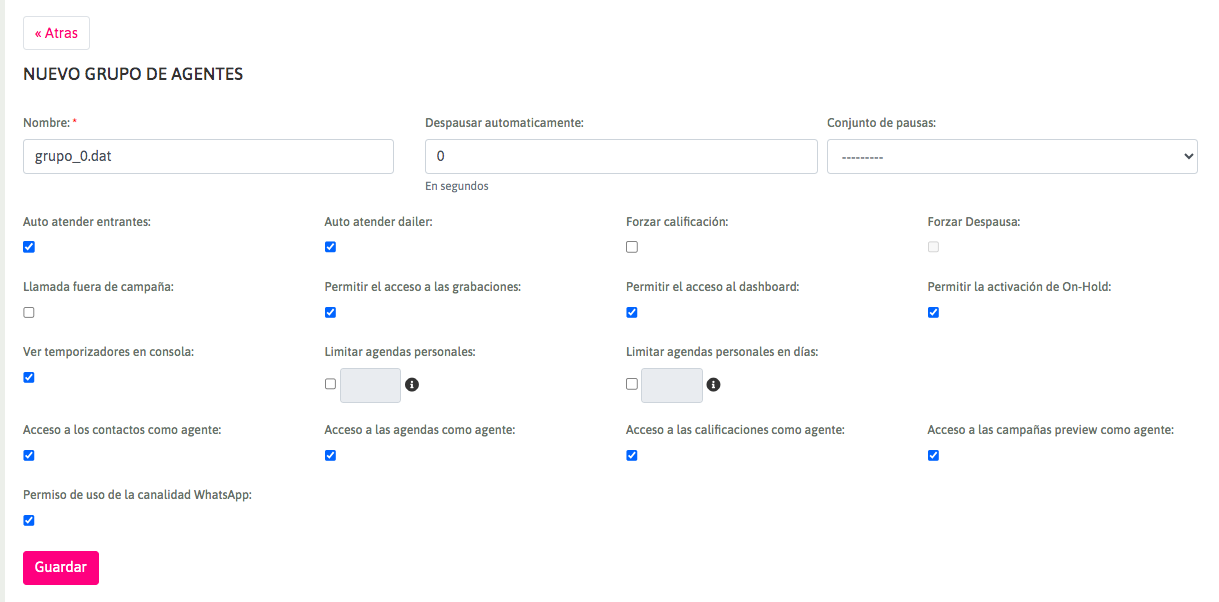
Figure 6: Agent Group Configuration
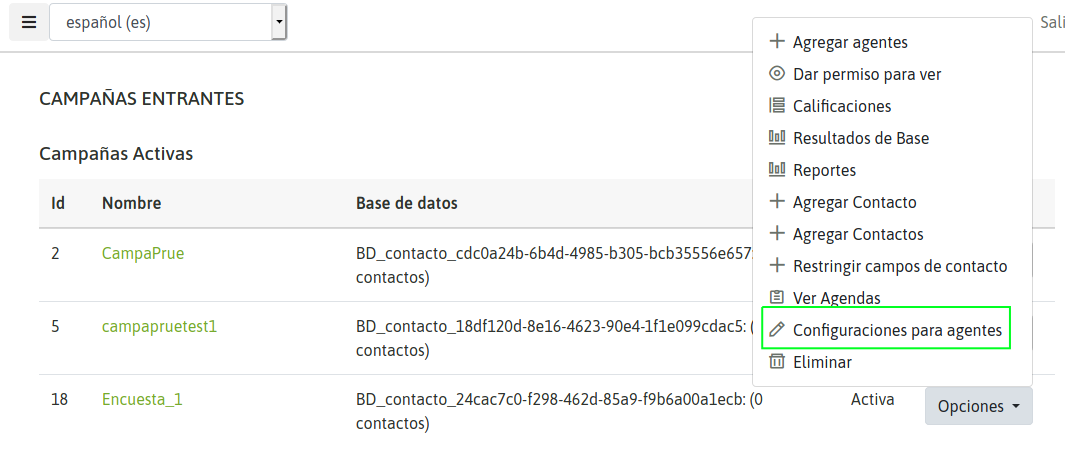
Figure 7: Settings for agents in campaign
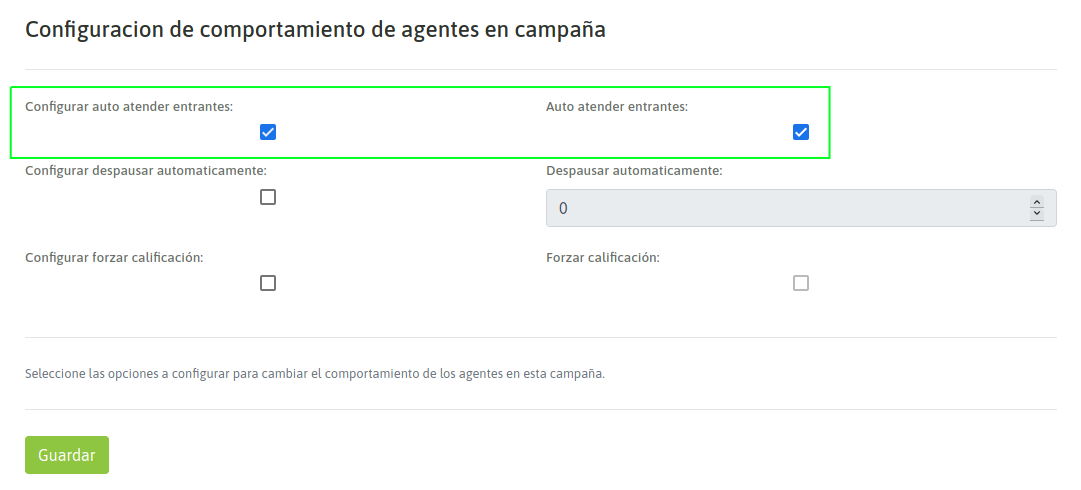
Figure 8: Settings for agents in campaign
Last updated