# Preview Campaign
## Creating a preview campaign
To create a new preview campaign, you must go to the menu Campaigns -> Preview campaigns -> New campaign. The creation process consists of a 2-screen wizard. In the first stage, you must indicate a series of campaign parameters, as shown in the following figure:
Figure 1: Campaign parameters
* Campaign Channel: These are the channels that will be accepted in the campaign. Visit the Whatsapp Business section to properly configure the Whatsapp channel.
* Name: Name of the campaign.
* Contact Database: The contact database that the preview dialer will use when delivering on-demand contacts to each agent.
* Duplicate Control: Used to control duplicate records in databases. Options are: Allow Duplicates / Avoid Duplicates.
* Interaction type: Indicates whether the campaign will operate with OMniLeads forms, with the invocation to a CRM (External URL) for each connected call, or with both methods at the same time.
* External URL: If you have selected to invoke an external URL in each call, this indicates which of the defined CRMs should invoke the campaign.
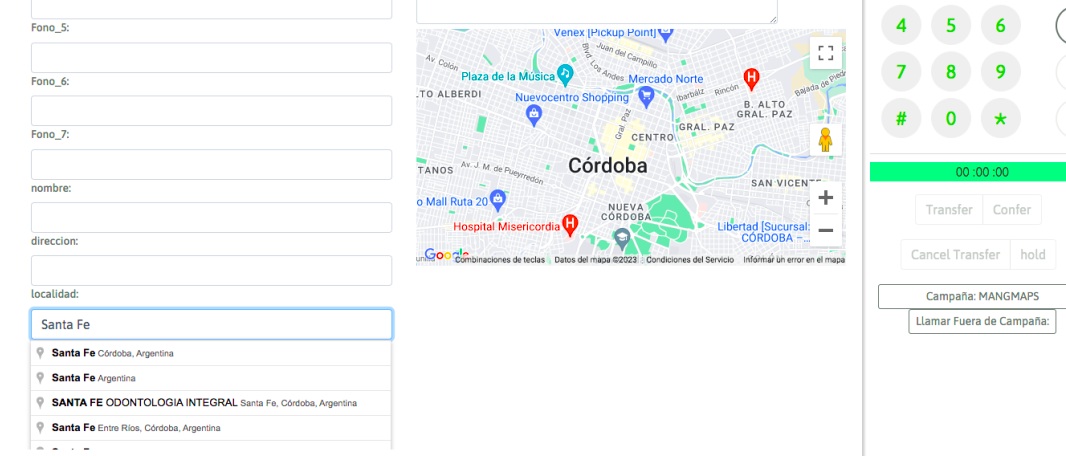
* Address Field: If you have activated the integration with Google API, this option allows you to select the database field that will serve as the Contact's Geolocation. The associated map will be included within the record in the Agent Console.
Geolocation
* Record calls: Enables all calls in the campaign to be recorded.
* Objective: This is defined as the number of positive actions expected in the campaign. During campaign monitoring, the percentage of progress of the campaign with respect to this defined objective is shown in real time.
* External system: This is where the external management system that would execute “click to call” on the campaign is assigned, if desired.
* ID in external system: This field must contain the ID that the campaign has within the external management system, from which the "click to call" or "contact qualification requests" will come.
* Outbound Route: An existing outbound route is assigned to a campaign.
* Outbound Route CID: This field must contain the CID assigned for an existing outbound route to a campaign.
* Disconnection time: This is the time that the preview dialer reserves a contact assigned to an agent, after which time the contact is released so that it can be requested by another agent.
* Speech: The campaign speech to be displayed in the agent console on campaign calls.
On the second screen, you must assign the ratings that are required as available for the agents when classifying each call to each contact. IMPORTANT: You cannot change the Management Form previously selected in the Rating Options Wizard if the Management Rating has already been used in the campaign.
Figure 2: Call Ratings
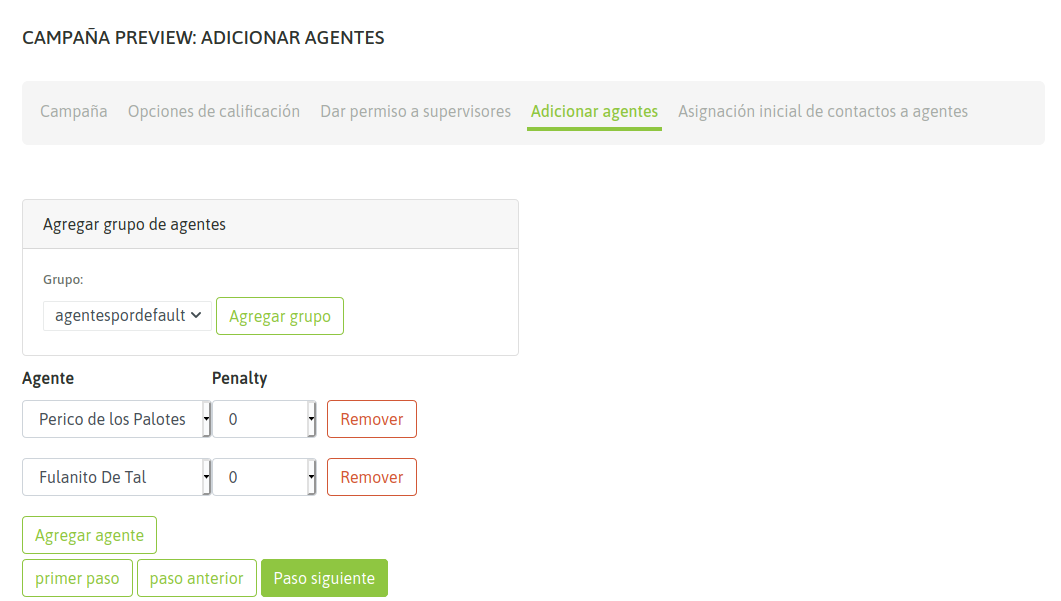
Next, it remains to assign the supervisors and agents who will be able to work on the campaign. The following 2 figures illustrate an assignment of agents to a campaign:
Figure 3: Assignment of supervisors
Figure 4: Agent Assignment
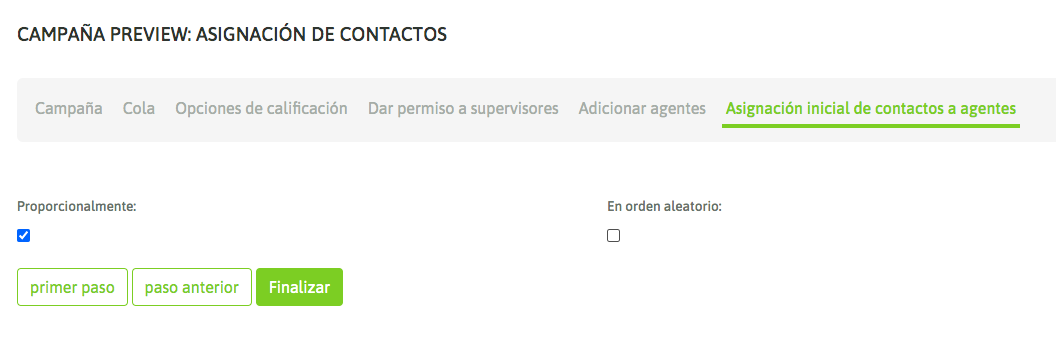
Finally, in the final stage of the wizard, it is optional to pre-assign contacts to agents. This pre-assignment can be done proportionally, by checking the "proportionally" option (the database records are divided among the agents in blocks of equal parts):
Figure 5: Default contact assignment
## Contact assignments
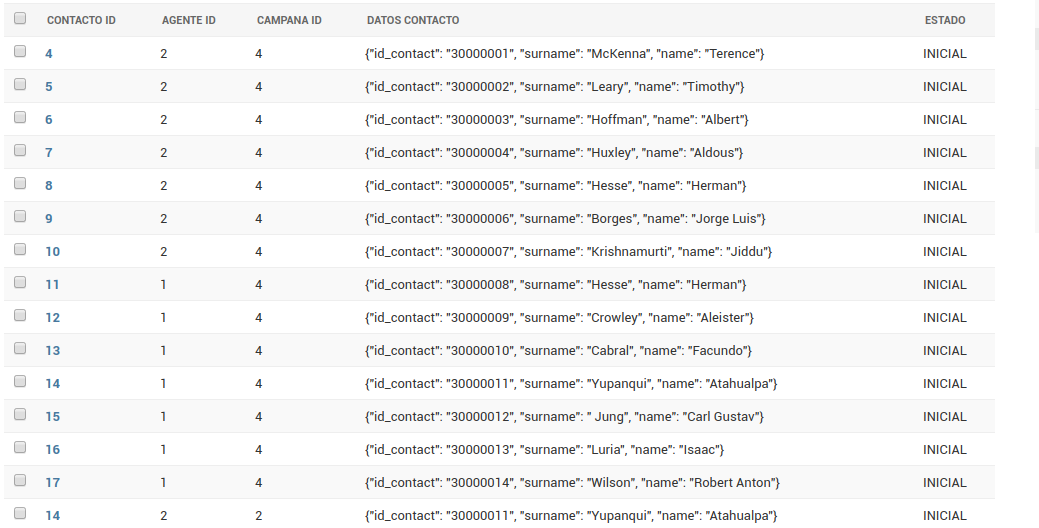
If the option to assign proportionally is selected, the system will perform an initial and equal allocation of contacts to each of the agents, allowing that in the agent console, when the agent requests a contact from the campaign, he will only be given free contacts or from the list of those that have been assigned to him. We can see an example of distribution using the Django administrative interface in the following figure:
Figure 6: Proportional distribution of contacts
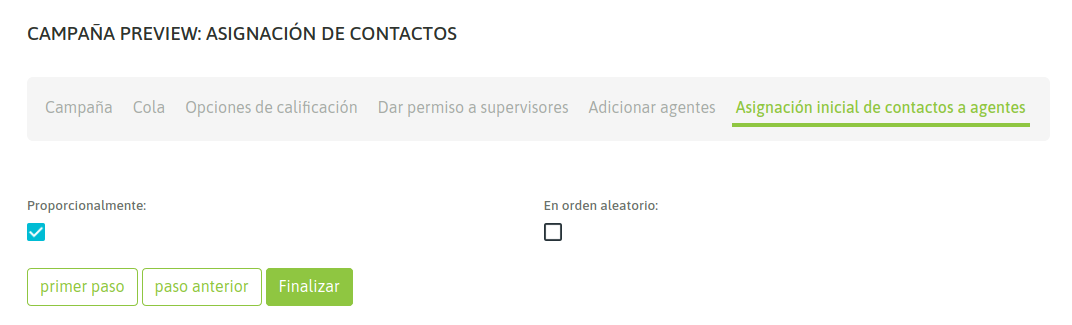
When selecting the proportional pre-assignment option, the system displays a new option to randomly assign:
Figure 7: New option to randomly assign
This option allows contacts to be assigned in random order to agents, as shown below:
Figure 8: Proportional and random distribution of contact
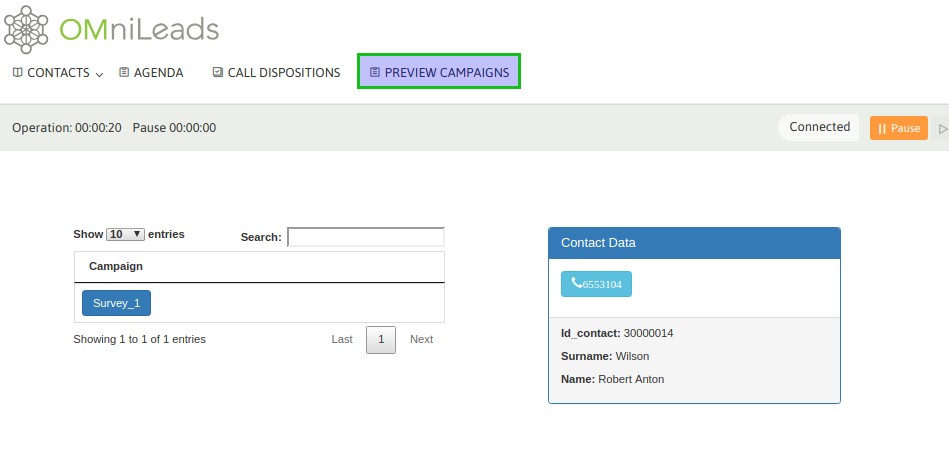
Finally, our campaign is ready to start operating. Therefore, when the agents assigned to it log in to the platform, they should have the preview campaign available, as shown in the following figure:
Figure 9: Agent view of the preview campaign
## Agent interaction with campaign
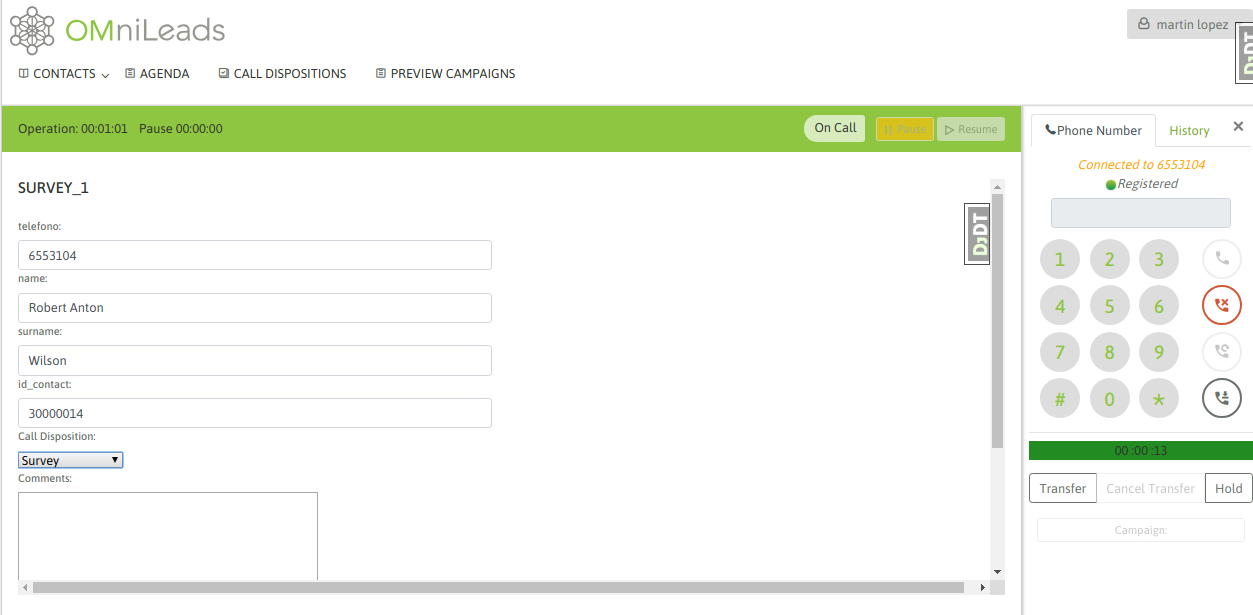
If the agent clicks on the phone, then the call is triggered, the data (extra to the phone) of the called contact is displayed in the agent view, allowing the agent to classify the call with one of the ratings assigned to the campaign:
Figure 10: Call to contact
## Campaign with multi-num database
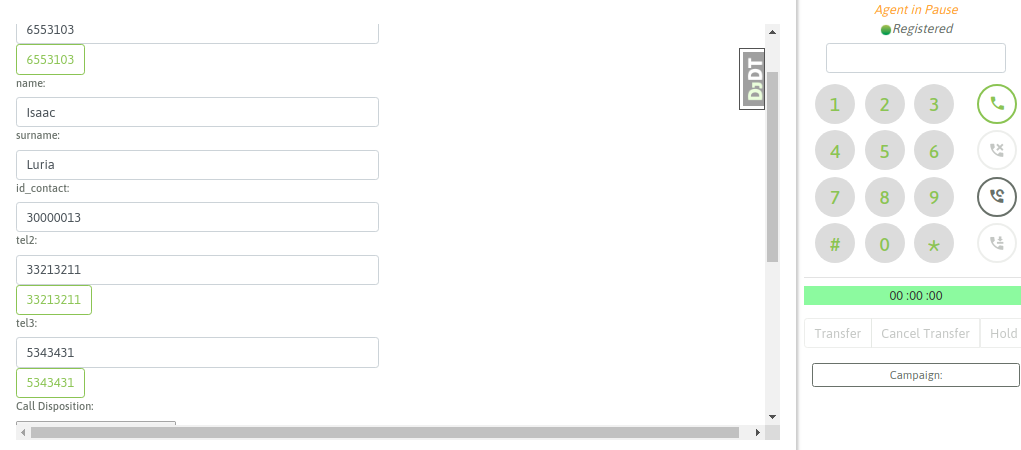
As we know, OMniLeads supports that each contact in a database has “n” contact phone numbers, so that if the contact is not found at its main number (the first one in our database CSV file), it can be contacted at the other numbers. In this case, each phone number (which we indicate in the database upload) is generated as a link within the contact data presented on the agent screen. Clicking on this link will trigger a call to the contact’s extra phone number. The following figure shows this scenario:
Figure 11: Multinum database
Therefore, the agent can try to contact all the numbers available as a "link" in the contact's file, until finally qualifying and moving on to a new one.
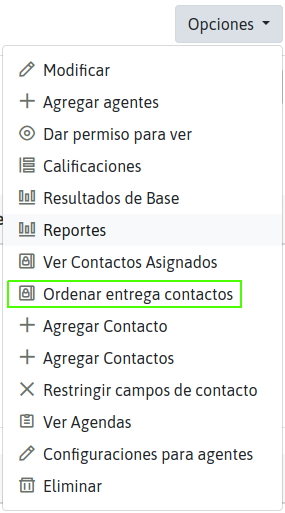
## Managing contact delivery
Once the campaign is created, the contacts available for each agent will be delivered following an order established in the AgentInContact model. \
\
This feature allows editing this order using the export/import of files in .csv format. The idea is that the administrator can download the current order of contacts to a .csv file, reorder the rows and then import the file, so that the new order impacts the order of assignment of contacts to agents in the campaign. This feature can be accessed using the campaign preview menu, as shown in the following 2 figures:
*Figure 12: Accessing the contact delivery ordering page*
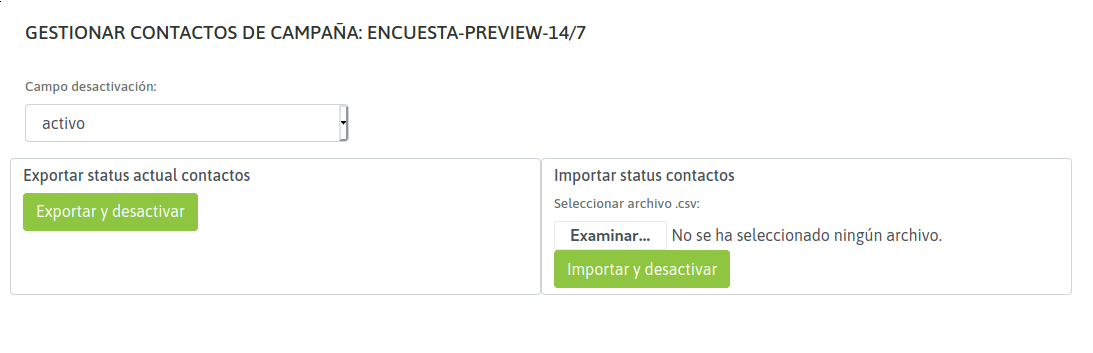
*Figure 13: Contact Delivery Reordering Page*
It is also possible to mark contacts as deactivated, which will not be delivered to any agent. \
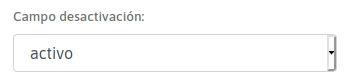
This is possible by defining a deactivation field for the campaign in the same view among the columns of the contact database data, as can be seen in the following figure:
*Figure 14: Contact deactivation field*
Important The field to be selected must be taken into account in the CSV format when importing the contact database before attaching it to the campaign. Adding or modifying column names in the CSV afterwards is not allowed. After exporting the current order of contacts, the deactivation column can be edited with the values 0 or FALSE, which, after importing the .csv file, will indicate to the system that these contacts should not be delivered to any agent. Any other value other than these causes the system to assume that the contact can be delivered.