# Initial Configuration
## Initial configuration
After going through the OMniLeads Installation process, we assume that the application is installed and available at the corresponding URL, so this section presents the essential post-installation configuration steps.
### Instance registry
This step is not mandatory, as the system can function perfectly without registration. However, the Registration Process allows easy access to manufacturer services and better traceability when reporting bugs or requesting new software features.
It is also necessary to have the instance registered when acquiring a Commercial Addon or Subscribing the platform to Manufacturer Support.
In the future, those certified integrators (who have passed the official OMniLeads certification program) will be able to sign the installation with the certification code upon registering the instance, thus leaving a record that the platform has been deployed and configured by a certified IT Engineer from the manufacturer.
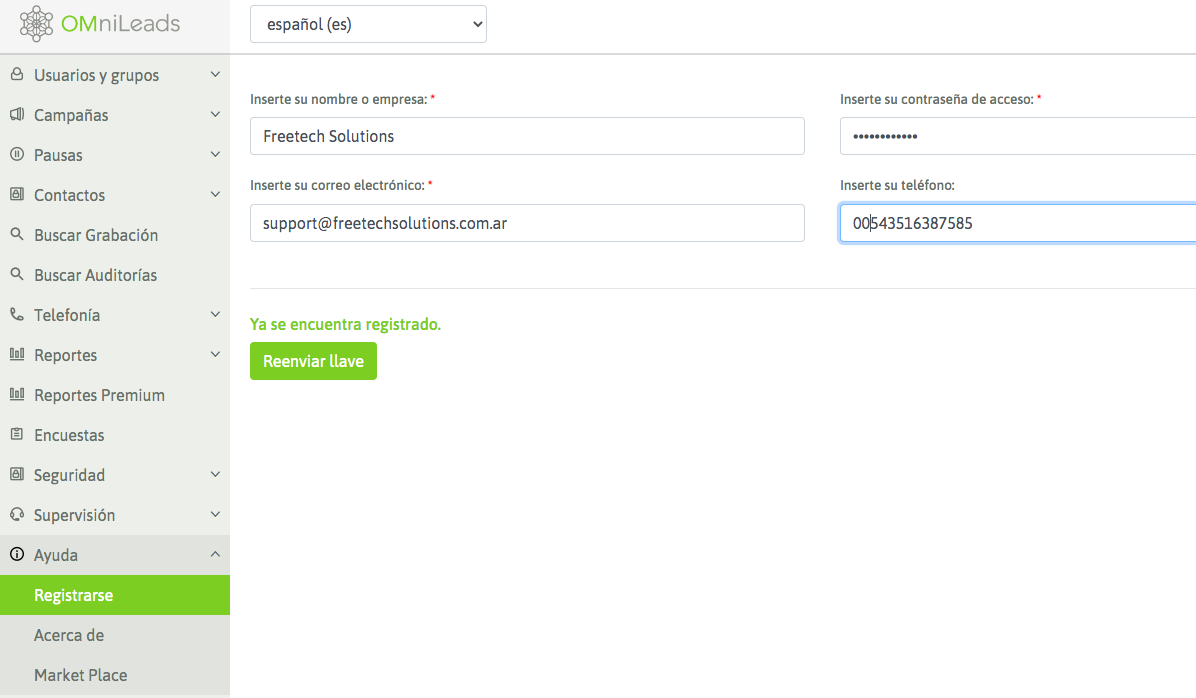
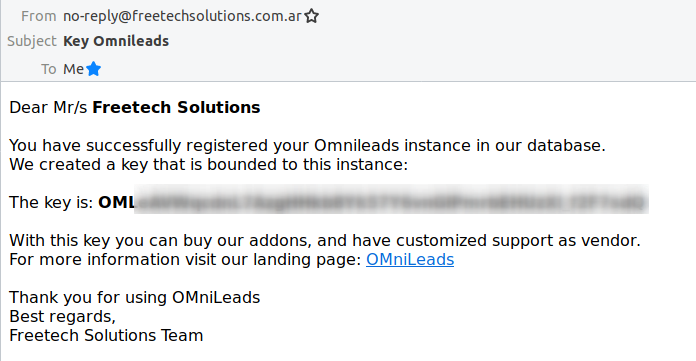
You need to fill in the requested fields, and then you will receive an email with the instance code.
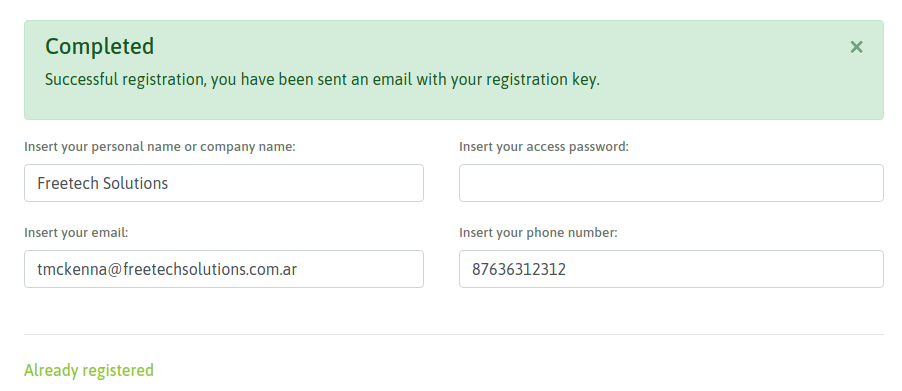
Then, each time we enter the registration section from the menu *Help -> Register*, an output will inform us that the instance has already been registered.
The instance registration requires the following mandatory fields: user or company name, email address, and password. The phone number field is optional.
Once the instance has been successfully registered, an email will be sent to the provided address with the value of the key assigned to the instance. If you would like the email with the instance key to be resent after registration, you can use the "Resend Key" button.
It is important to note that if you want to register multiple instances with the same email address, you must also enter the same password. Otherwise, use a different email address.
### Roles and permissions
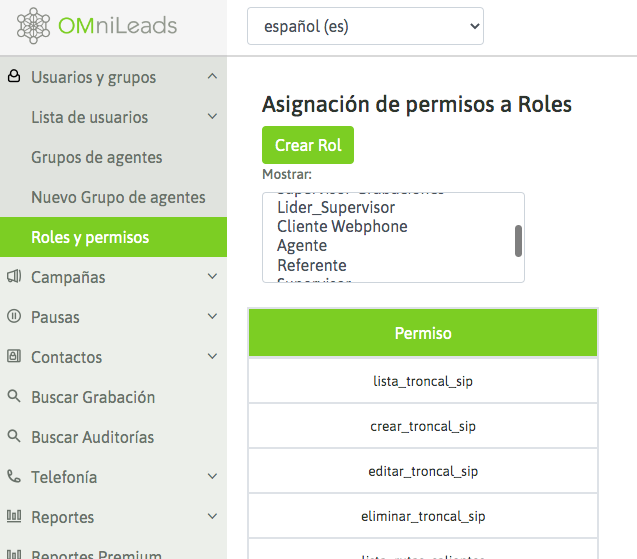
In this section of the cited module, you can list the system's predefined roles, check the specific permissions for each role, and finally create new custom roles with certain privileges or limitations according to your needs. You can access this module from the menu \_Users and Groups -> Roles and Permissions
Below, the predefined roles are listed:
* **Webphone Client**: This role, although created by default, is only used when the addon [Click2Call](https://www.omnileads.net/click2call) is activated in OML Enterprise
* **Agent**: Users generated and assigned to this role can access the agent console, with all the permissions it implies (access to the webphone for initiating calls, the ability to take breaks, access to the agent's schedule, recordings, among others).
* **Role Description**: Users generated and assigned to this role will only be able to list all campaigns, view general reports of agents and calls, access agent and campaign supervision.
* **Supervisor**: Users generated and assigned to this role can work with all the campaigns they are assigned to (create, modify, delete, and list), as well as access the supervision and general reports of calls and agents. They can also search for recordings of their campaigns, list and upload contact databases, and access the telephony module, where they can work with some sections. Additionally, they can edit and delete agents they have created, regardless of whether they are assigned to their campaigns. A supervisor can grant "View Permissions" to other supervisors (to any other supervisor, regardless of whether they created them) only for campaigns they have created. However, they cannot assign supervisors to campaigns they did not create.
* **Manager**: Users generated and assigned to this role will be able to perform all the actions of a supervisor, and will also be able to view the Audits module.
* **Administrator**: Users created and assigned to this role have full access to the entire system. Only administrators can edit or delete users with the Administrator profile.
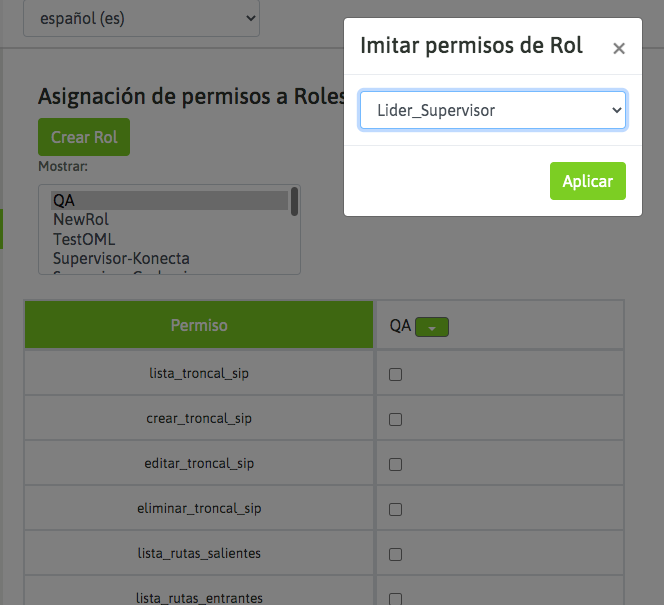
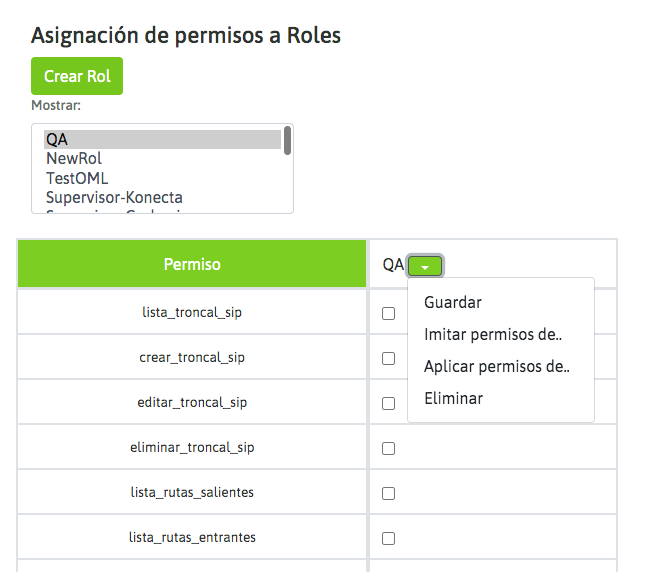
To create a custom role, you must access the menu Users and groups -> Roles and permissions -> Create role. The new role is given a name and then the permissions it will have are marked. In order not to start from scratch, the user can start from a base of permissions for a certain profile, and then continue customizing (adding or limiting permissions) until the role is ready.
The following is an example of creating a new role:
* Creating a new role: A new role is created and a name is assigned to it.
From the combo box of options for the new role created, you can imitate permissions from another existing role, or apply permissions from another existing role. The difference is that the first option sets the same permissions as the existing role, while the second option adds the permissions of the existing role to the permissions that have already been selected in the new role.
* Saving the new role: Finally, the newly created role is saved.
### Users
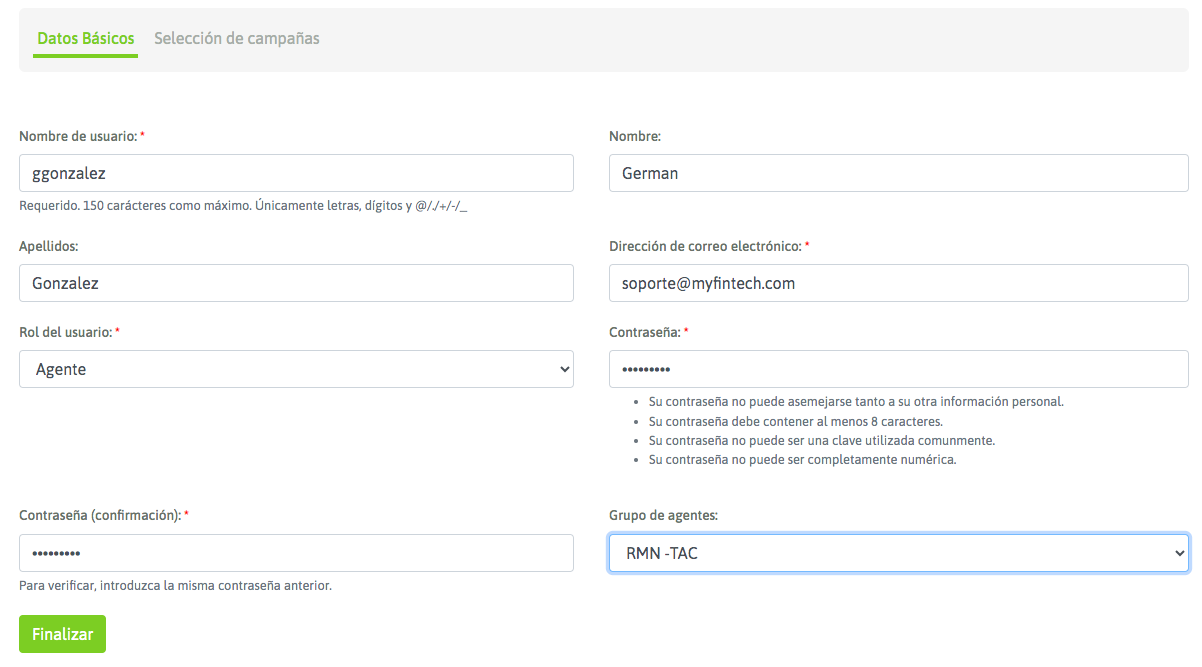
We will differentiate between "Agent" type users and "Administrative" type users. Agent users are those who manage communications, and Administrative users manage the application (Administrator, Supervisor, Referrer, Manager, etc.). Important Before creating an Agent user, at least one Agent Group must exist. To create a user, you must access the menu Users and groups -> User list -> New user.
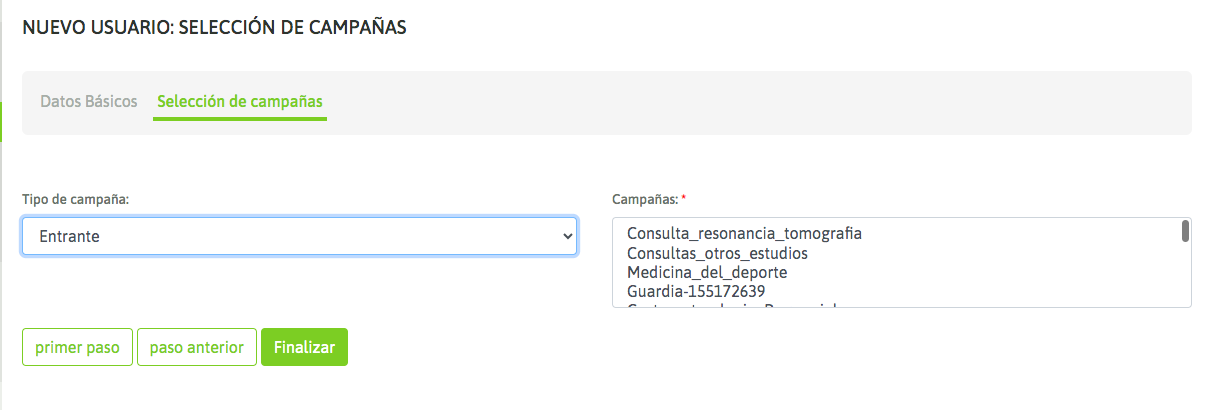
There, a form is displayed to be completed with the new user's data. Within this form, from the User Role option, it will be determined whether the new user will be of the "Agent" or "Administrator" type, according to the role associated with the created user. Moving forward in the Wizard, we proceed to the Campaign Selection, where the view allows us to select (by Type) the campaigns to which the created user will be associated. In this way, by clicking on Finish, the user is ready to operate on the platform:
Selección de Campañas
### Cloning agents
To achieve agility when creating resources in the system, the Users view allows agents to be cloned while preserving both their assigned campaigns and their group configuration. In this way, the administrator and/or supervisor can save valuable configuration time without having to repeat actions for each resource created:
### Agents Groups
In this section, agent groups are managed, groups that will be invoked in different modules of the system, such as when assigning users to campaigns, or when extracting reports, as well as in the supervision module.
**Creation of agents group**
To create an agent group, you must access the Users and Groups -> New Agent Group menu.
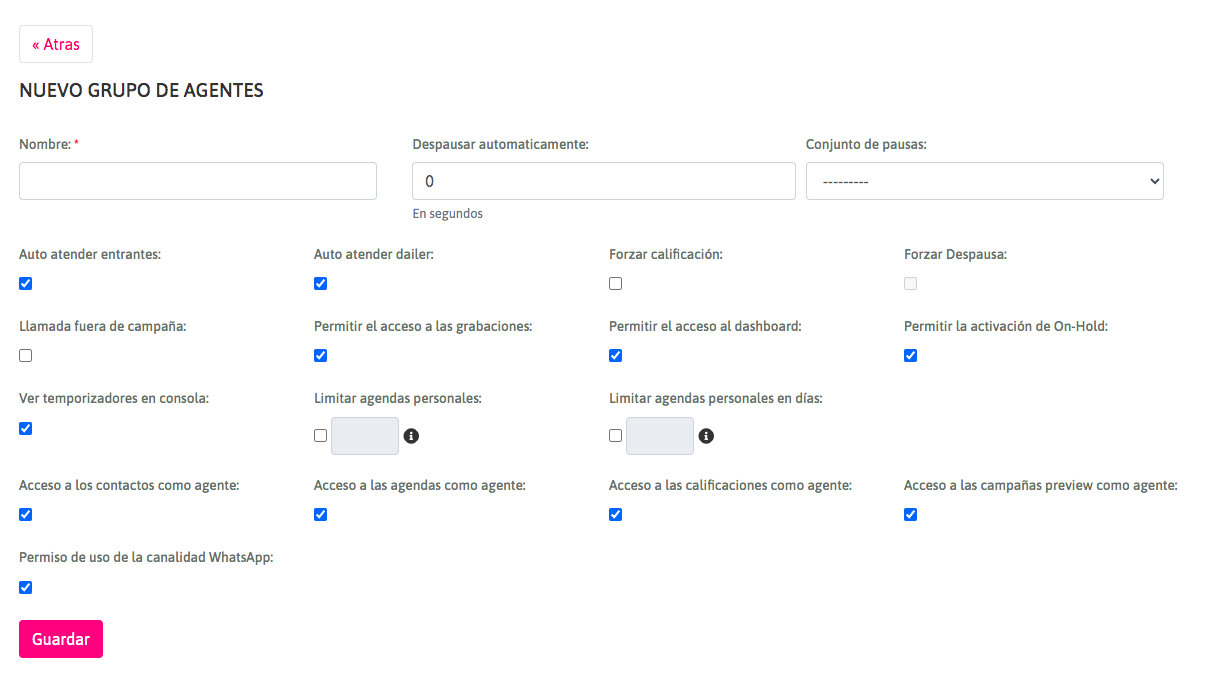
The fields displayed there are the following:
* **Name**: This is the name you want to assign to the agent group.
* **Automatically unpause**: To understand this parameter, we must explain that in OMniLeads, after each call (of any nature) processed by an agent, the agent is forced to enter an ACW (After Call Work) pause, in which he remains inactive for the assigned campaigns, so that he can complete the qualification of the current call and finish his management. Now, to exit this pause induced by the system, there are 2 possibilities, and that is where our parameter comes in, since on the one hand if we leave the value at “0” the agent must explicitly exit the pause to continue operating, but if we enter a number (for example, 5 seconds), this implies that the agent assigned to this group, after falling into an ACW-induced pause, the system will put him back online after X seconds (as indicated in “Automatically unpause”). This parameter can be managed from the agent group, or from a campaign configuration, which will be mentioned later.
* **Set of breaks:** Here you can assign a group of breaks (previously created) to the group of agents, so that the agents that are part of said group do not see all the breaks, but only those that are part of the assigned group of breaks.
* **Auto answer incoming calls**: If this value is checked, then calls from incoming campaigns will be connected to the agent without providing the possibility of notification (ring) and the option for the agent to answer.
* **Auto answer dialer:** If this value is checked, then calls from campaigns with predictive dialer will be connected to the agent without providing the possibility of notification (ring) and the option for the agent to answer.
* **Force rating:** If this value is checked, then all calls made or received by the agent must be rated before the agent is able to resume service. Selecting this option disables the ability to automatically unpause the agent, as rating becomes mandatory.
* **Force pause:** If the “Force qualification” option is enabled, then this second option is offered to force the pause, once the call has been qualified. If this value is not checked, the agent will have to explicitly resume operation after qualifying the call.
* **Calls outside of campaign:** If this value is checked, it will allow the agent to make calls that do not fit into any campaign, taking into account that these will not leave a record of reporting, recordings, etc.
* **Allow access to recordings:** If this value is checked, the agent will have access to search, download and listen to their own recordings.
* **Allow access to the dashboard:** If this value is checked, the agent will have access to the dashboard regarding his/her management.
* **Allow On-Hold Activation:** If this value is checked, the agent will be allowed to put a call on hold.
* **View timers in console:** If this value is checked, the agent will be able to see the operation and pause times displayed in the upper left corner of the agent console.
* **Limit personal agendas:** If this value is checked, you can enter the maximum number of personal agendas that an agent can manage.
* **Limit personal schedules in days:** If this value is checked, you can enter the maximum number of days that the agent will be allowed to use when scheduling a call. That is, the agent will be able to schedule calls within the N-day window configured from this parameter.
* **Access to contacts as agent:** If this value is checked, the agent will have access to the contact list, from the agent console.
* **Access to calendars as an agent:** If this value is checked, the agent will have access to the calendar, from the agent console.
* **Access to ratings as an agent:** If this value is checked, the agent will have access to the list of managed ratings, from the agent console.
* **Access to preview campaigns as an agent:** If this value is checked, the agent will have access to the list of preview campaigns to which he is assigned, from the agent console.
* **Permission to use the WhatsApp channel: I**f there is integration with WhatsApp Business, this skill allows access to sending/receiving WhatsApp messages.
* **Restrict Manual Call Types:** This checkbox allows you to customize the types of campaigns that will be displayed when an agent attempts to make a manual call on behalf of a campaign.
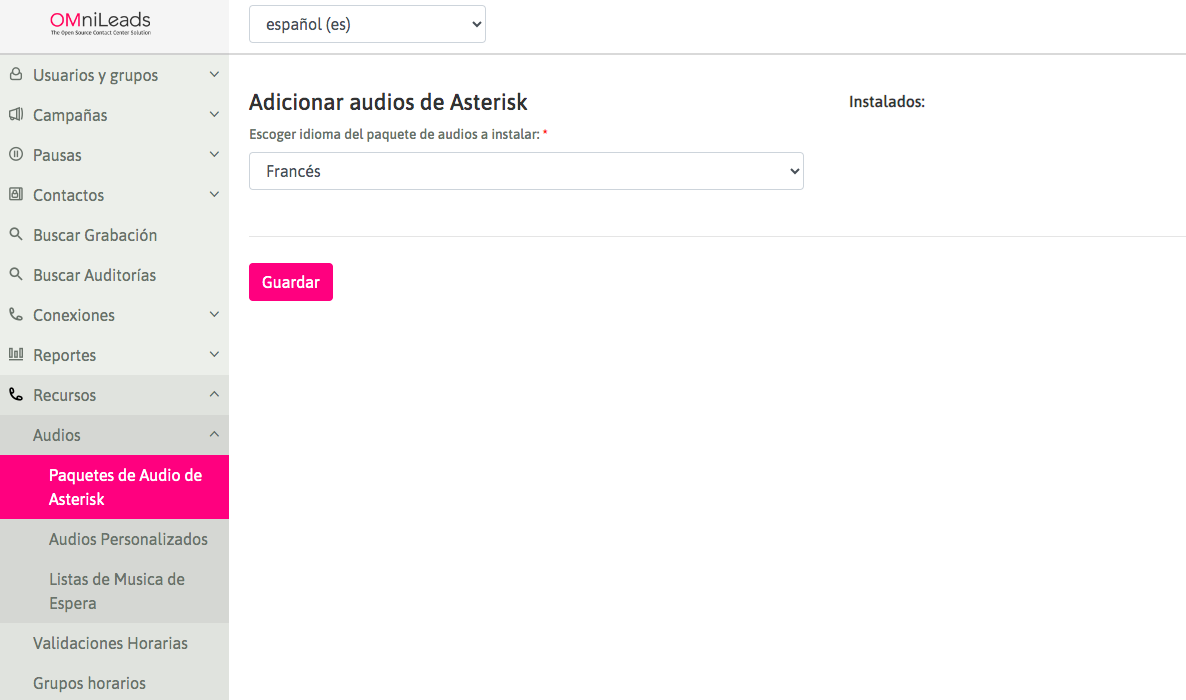
### Add audio packs in other languages
The generic audios that agents or external telephones will hear come by default in English, being configurable in the incoming routes or outgoing routes, so that if the telephone channel encounters any indication through a generic audio within the flow of a call, it can be played according to the indicated language.
If the instance needs to use other languages, they can be installed through the Resources -> Audios -> Asterisk Audio Packages section, where new languages can be added.
Selecting the desired language and pressing the “Save” option will download and install the language pack.
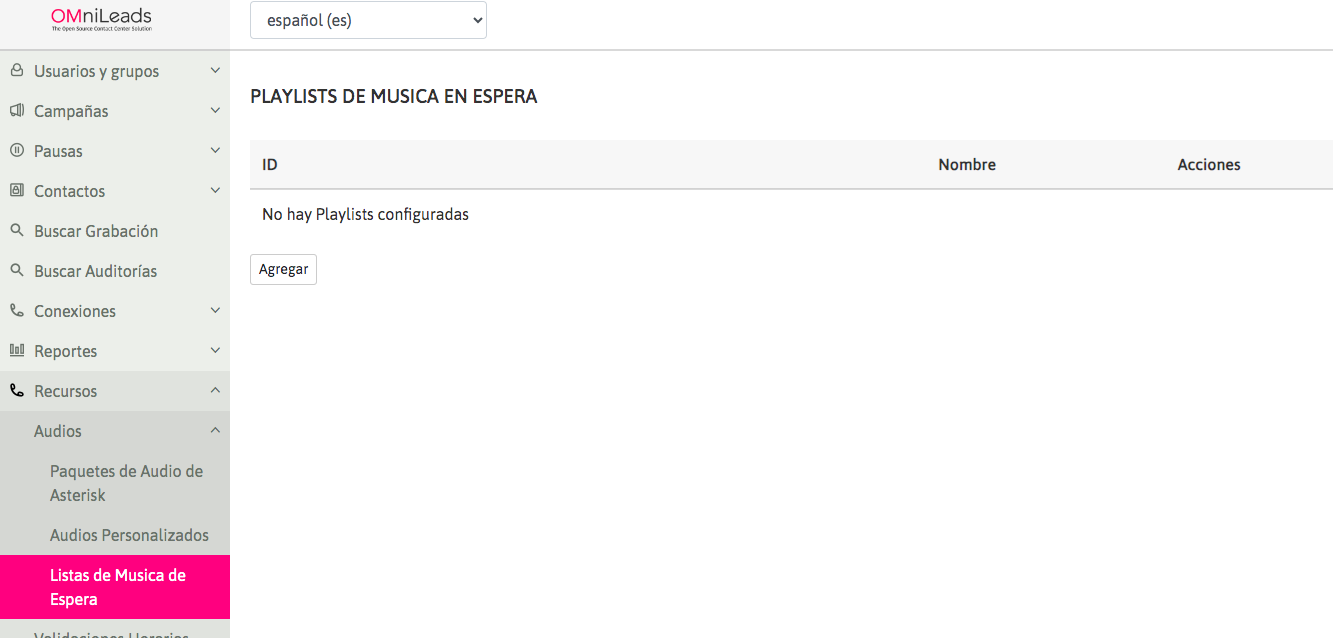
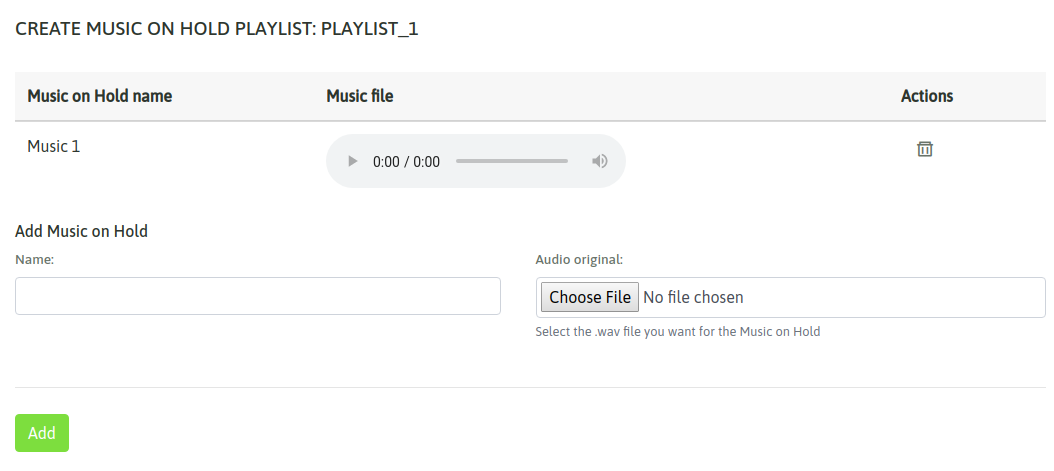
### Music on-hold
Within the Telephony -> Audio -> Music on Hold module, you can manage playlists with files in 16-bit wav format. The lists generated here can be used in incoming campaigns when putting callers in a waiting queue. It should be noted that playlists that are in use by a campaign or that have files assigned to them cannot be deleted.
Once a new playlist has been created, the desired songs must be added, via .wav files uploaded from your computer. Only playlists that have at least one song uploaded will be available for use in incoming campaigns.
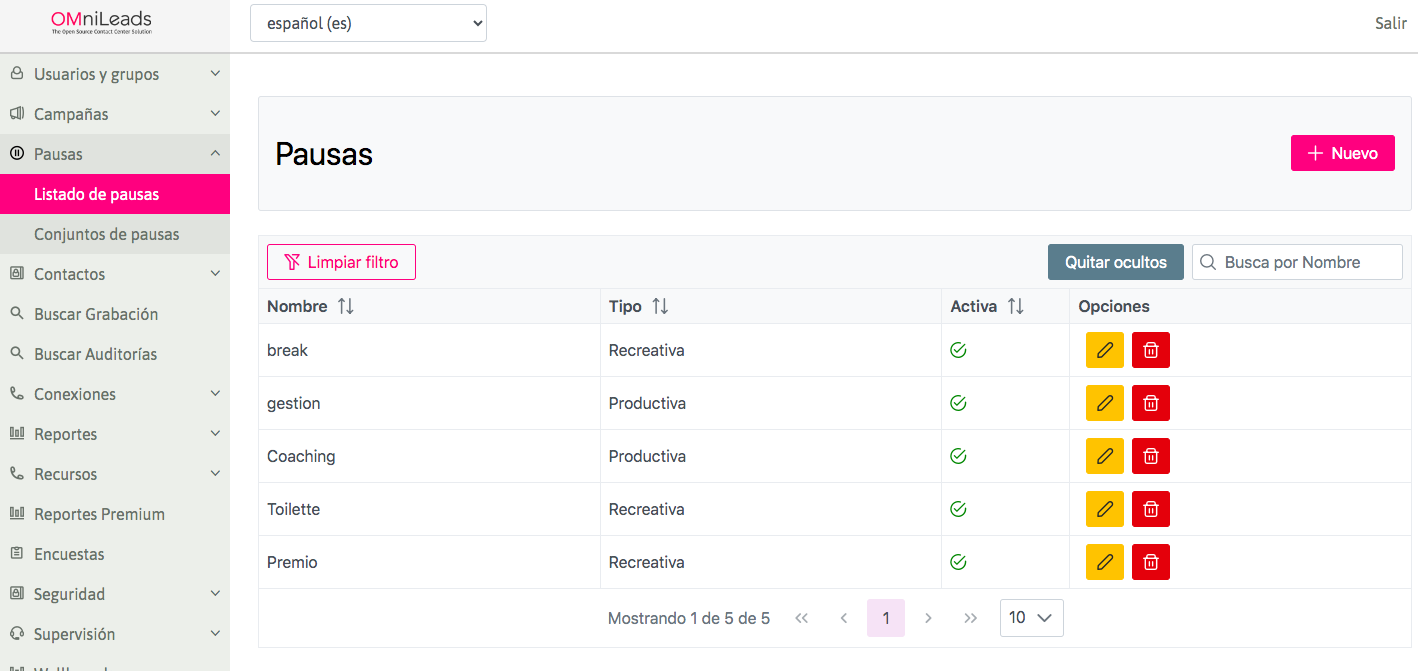
### Pauses
Agents can enter a pause whenever they want to be freed up to handle new calls, thereby preventing an incoming or predictive dialer campaign from delivering a new call to them. Pause states are also useful for recording productivity and measuring agent session times.
Las pausas las pueden generar los usuarios con dicho permiso, y pueden ser del tipo «Recreativas» o «Productivas».
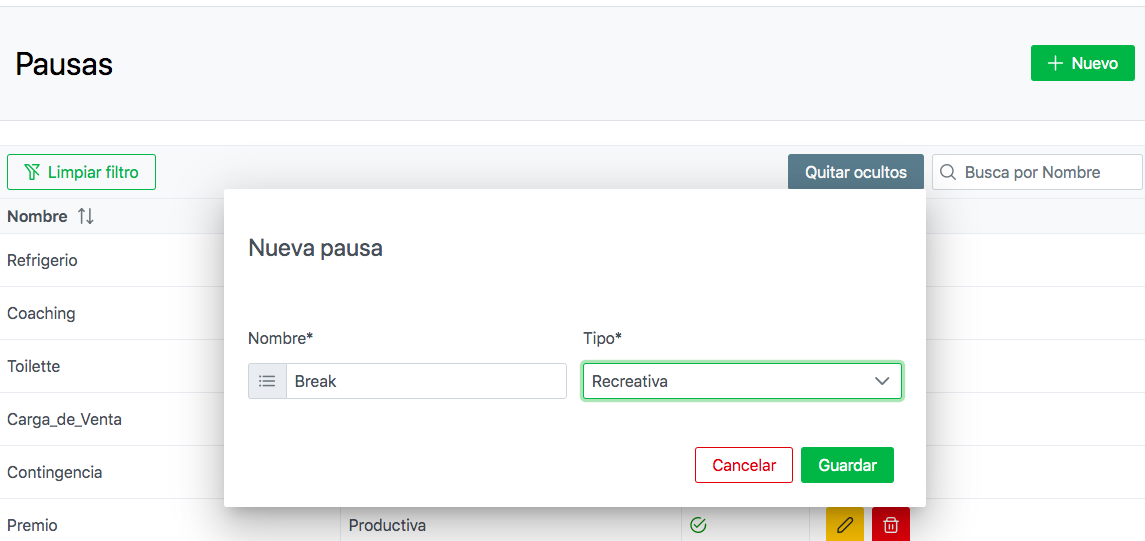
**Pause Creation**
To create a new pause, go to the menu \_Pauses -> List of pauses -> New
When presenting agent session reports, total pauses are divided into recreational pauses and productive pauses, allowing us to measure our agents' productivity more accurately. From the displayed form, a name is assigned, the type of pause is selected, and changes are saved.
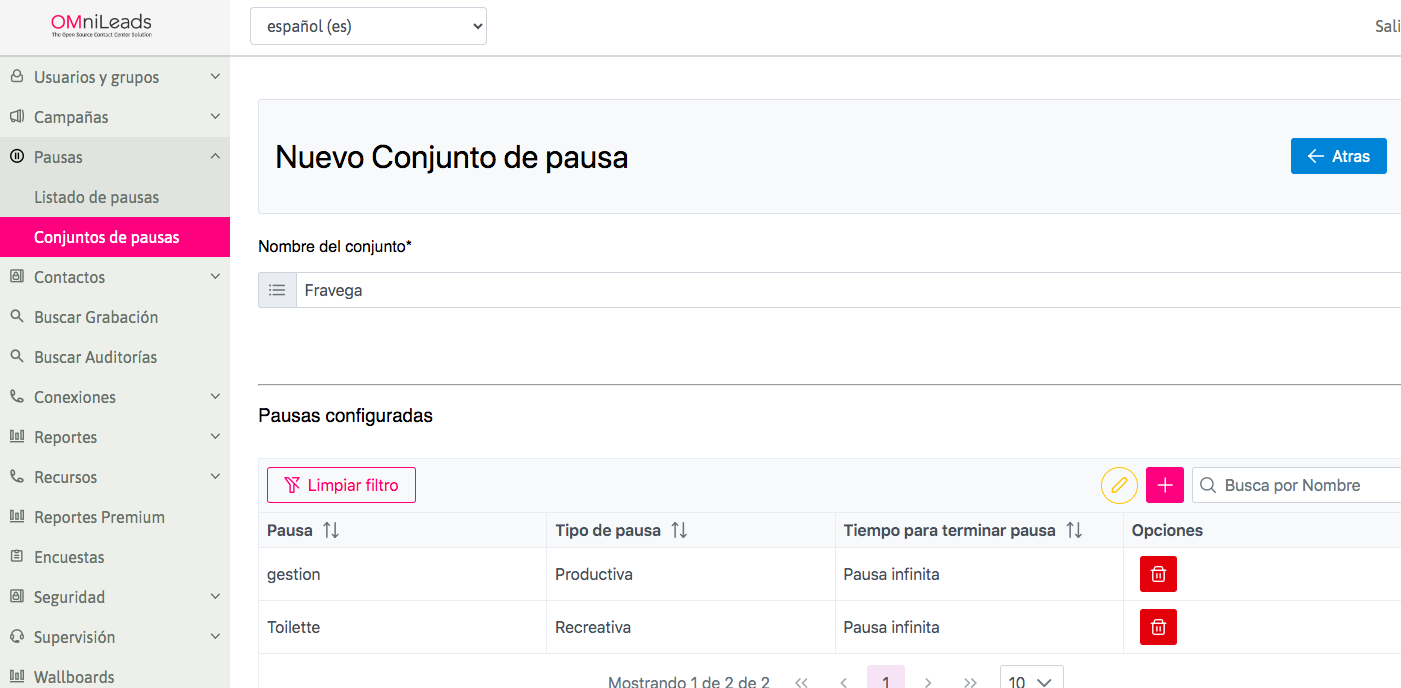
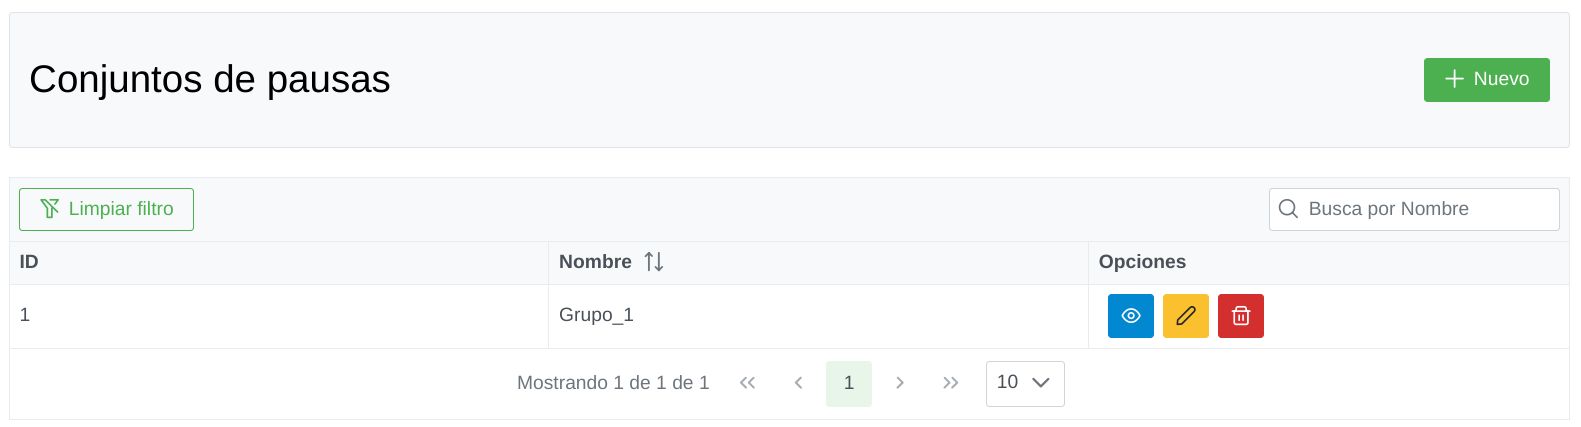
**Pause Groups Creation**
Pause groups allow, as their name indicates, the grouping of certain previously created pauses to be assigned to groups of agents. This way, agents who are part of a specific group of agents with a specific pause group will be able to use only the pauses from that group from their agent console and will not have access to all the pauses registered in the system.
To generate a set of pauses, go to the menu \_Pauses -> Pause Sets -> New
From the displayed form, assign a name, add previously created pauses to the new group, and save the changes.
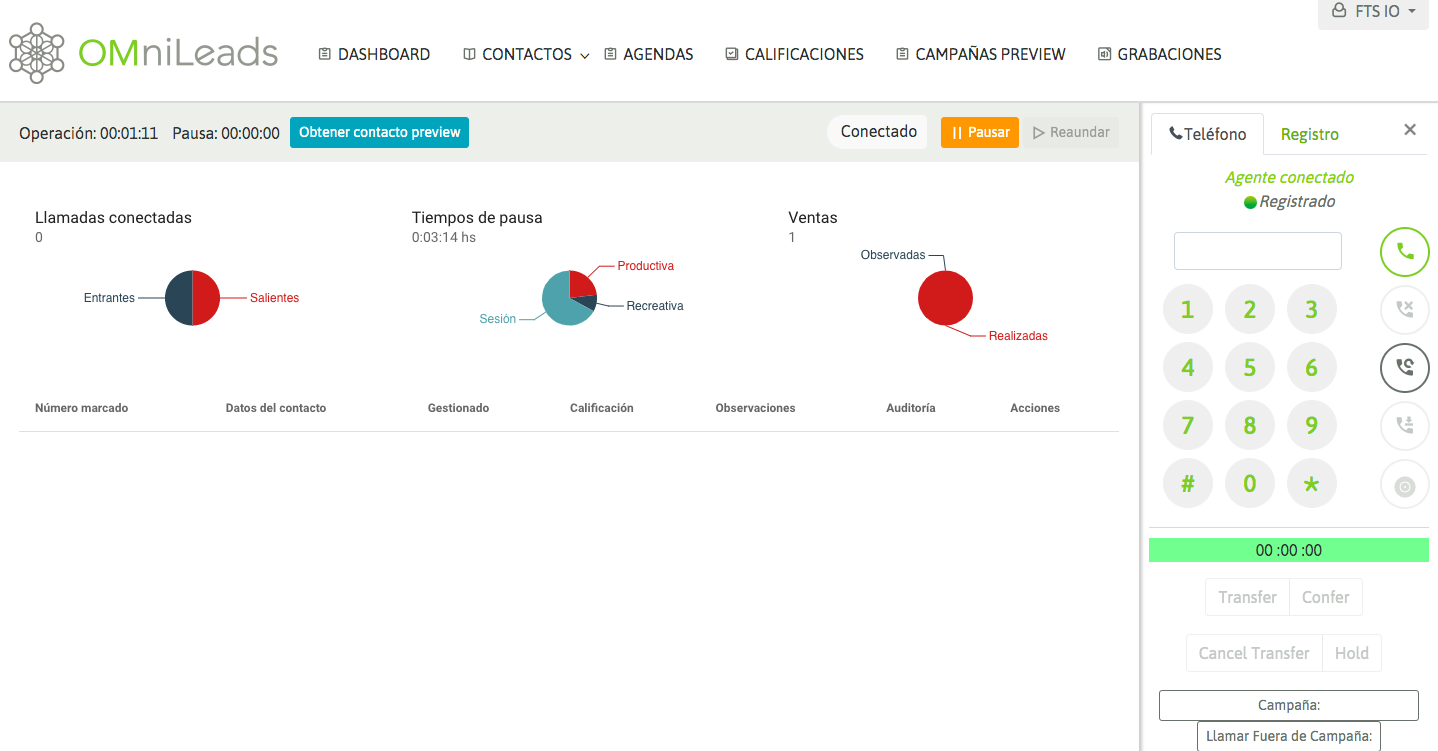
### Agent first login
MICROPHONE:\
Please note that in order to obtain a successful login, a MICROPHONE must be available on the workstation from which the agent login was performed. If this is not the case, then the login will be faulty.
Once we access with our agent, if everything goes well, a popup will appear requesting permission to take control of the microphone:
When enabling the permission, we should hear an audio that the system plays, indicating a successful login:
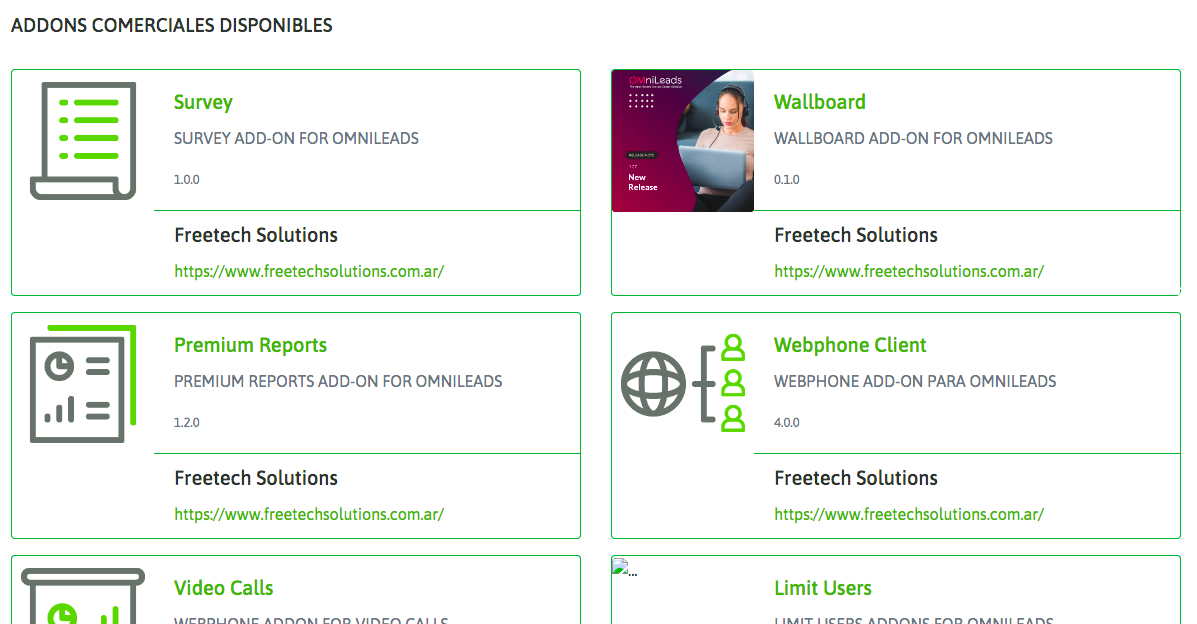
### OMniLeads Enterprise Features
The system provides information about the commercial addons available in the OMniLeads Enterprise version through the menu \_Help -> Marketplace
For more commercial information about the Enterprise version, request your demo at .