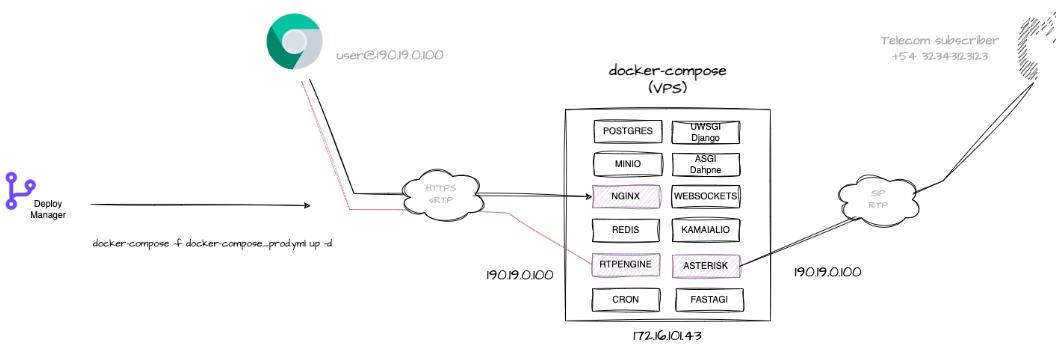
It has already been shown how to deploy OMniLeads using Docker Desktop. However, for environments that use Virtual Machines (VM) or Virtual Private Servers (VPS), it is necessary to work on some configuration variables.
Note: If you are working on a VPS with a Public IP, it is mandatory to have a network interface dedicated to a Private IP.
To do this, within the Linux Host, we will use the first_boot_installer.sh script from our repository and grant it execution permissions with the following command:
Prior to running the installation, it is important to specify the scenario in which you will work. If you use a VPS, the environment to configure will be "cloud," and it will be "lan" if using a Virtual Machine. For this purpose, we will define the environment variable ENV as either "cloud" or "lan" accordingly.
Additionally, we need to set the NIC variable to parameterize the private network interface that the platform will use for communication between internal components. For example: "eth0".
Finally, we must specify whether we will use Wombat Dialer for the Predictive Dialer service configuration or if we will install OMniLeads without this component. Depending on the case, we can now proceed to install our Contact Center Suite:
Where DIALER_HOST refers to the LAN IP Address of the dialer, DIALER_USER and DIALER_PASS represent the default username and password for the Third Party Wombat Dialer.
https://www.wombatdialer.com/installation.jsp Note: remember that if you want to deploy Wombat Dialer in this scenario, you need to have a VM/VPS to install the dialer there and then configure it to work with OMniLeads. More information at the following link:
In any case, we can proceed to bring the services down or up again using Docker-Compose instructions.
Once the installation process is finished, the installation script takes care of starting the application and gives us access to an initial login.
$ docker-compose -f docker-compose_prod.yml down #Para bajar los containers.
$ docker-compose -f docker-compose_prod.yml up -d #Para levantar los containers.
For more information, we suggest visiting the official project repository documentation, where you can review the steps necessary to obtain the first access to the UI with an Administrator user in the First Login section.