AIO (All-In-One) Deploy
OMniLeads on a Linux Host "All In One"
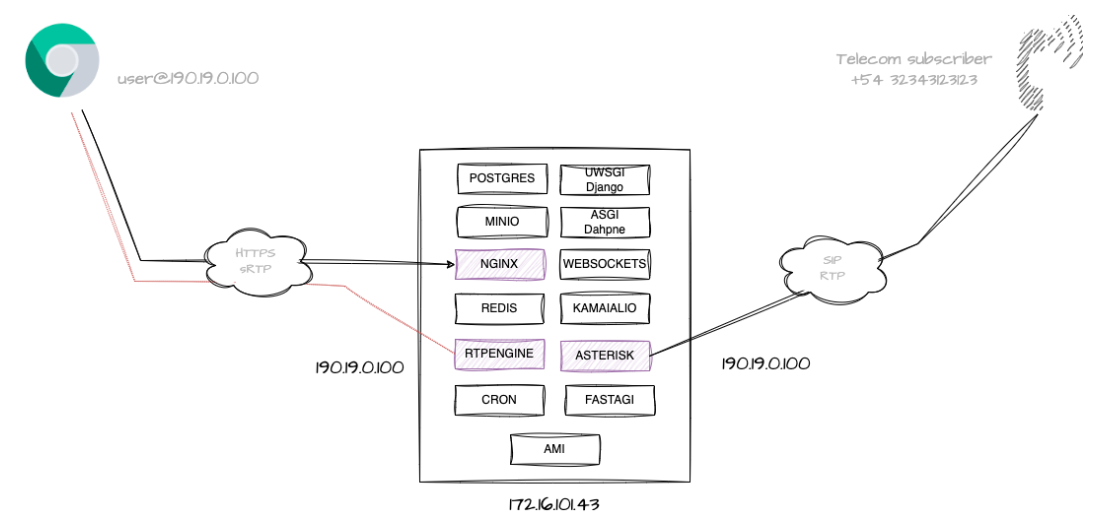
Using this installation method, it is possible to deploy the OMniLeads Suite on a single Linux Host with all its components involved locally (localhost):
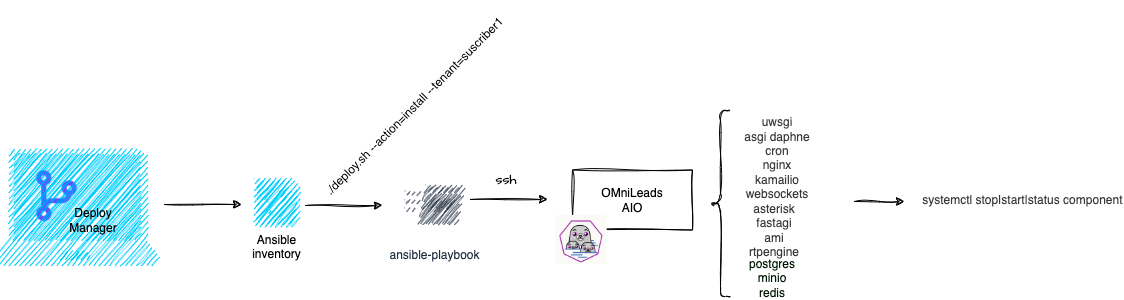
To do this, a Linux instance (with any modern operating system) with Internet access is required. Since Ansible uses an SSH (secure shell) connection process to access the instance and run its playbook, it is a mandatory requirement to have the SSH public key and the known_hosts file configured appropriately.
Understanding the Inventory File
Below is a generic inventory file for a typical deployment in the AIO scheme. In its first section, the different hosts are listed by tenant and by type of deployment to be executed (aio_instances):

In its second section, the inventory file allows parameterizing environment variables necessary for the action. Note: By default, all of them directly affect ALL declared instances, unless a variable (or group of variables) is specified in the host (or group of hosts) section in question.
Finally, the last section covers the grouping of hosts based on the selected architecture. In our case, under the omnileads_aio label the AIO instance(s) that are intended to be deployed would be listed.
The tags for omnileads_data, omnileads_voice, etc. refer to Horizontal Cluster and HA Cluster deployment labels, which will be seen in future sections). Below is an example:
Now, let's get to work!
As a first step, we proceed to create the instances folder in the root directory. Following this, inside it we will create a subfolder where we will host the example inventory file provided by the repository:
Note: Although we are within a versioned repository, the name "instances" is reserved and is ignored by the repository from the .gitignore file.
Based on the understanding of the inventory file sections, we will declare our future OMniLeads instance in the aio section. In our case, we will use the example name "algarrobo" to define the tenant:
It is important to specify the scenario in which you will work. If we will use a VPS, the environment to configure will be "cloud", and it will be "lan" if a Virtual Machine is used. To do this, we will define the infra_env environment variable as appropriate: "cloud" (by default) or "lan".
The variables tenant_id (name of the tenant), ansible_host (IP address that Ansible must reach to run the Playbook) and omni_ip_lan (private IP address of the lan interface) are mandatory to specify the tenant. In turn, the bucket_url and postgres_host variables must be commented out, so that both PostgreSQL and MinIO Object Storage are installed within the instance.
Finally, we must ensure that the last section contains the tenant within the omnileads_aio group. Below is an example about our tenant "algarrobo":
With the inventory file configured, we proceed to execute the new tenant installation action:
In the First Login section, you can review the necessary steps to obtain the first access to the UI with the Administrator user.
For more information, we suggest visiting the documentation displayed in the official project repository.
Last updated