Register WhatsApp Business in GupShup
Creating a WhatsApp Business Account (WABA)
Once the account has been created in the BSP Portal in the previous section, we can proceed to create (or migrate) our WABA: Whatsapp Business Account.
In our case, GupShup makes its official documentation available to help us move forward with the technical and integration aspects. It is always advisable to review it in case of possible changes in methods and procedures.
Below is an example of the complete activation wizard for WhatsApp Business with GupShup. Important: For correct use of WhatsApp Business API, Meta requires a valid WhatsApp Business number as well as a Meta/Facebook Business Account with its corresponding Business Manager in order to validate the Business that is subscribing to the service. With this, Meta ensures genuine and healthy contact mechanisms, while paving the way for the convergence of new Business channels: Meta Messenger and Instagram Messenger.
Starting the GupShup Wizard
Step 1: From the Control Panel -> Whatsapp, create an Application by clicking on the "+ Create Application" button and specifying a descriptive name.
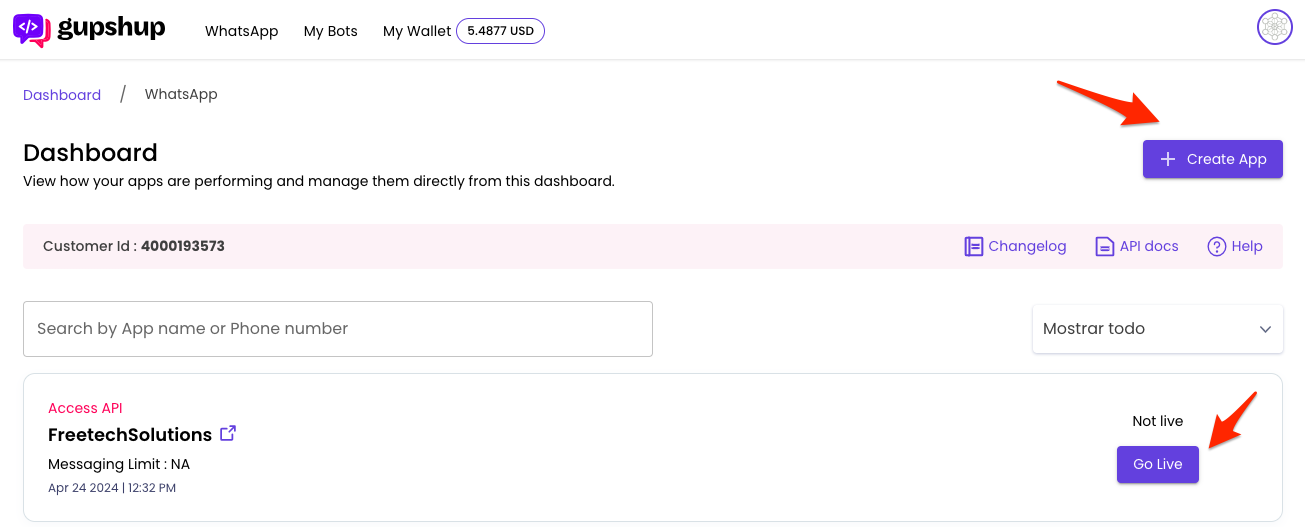
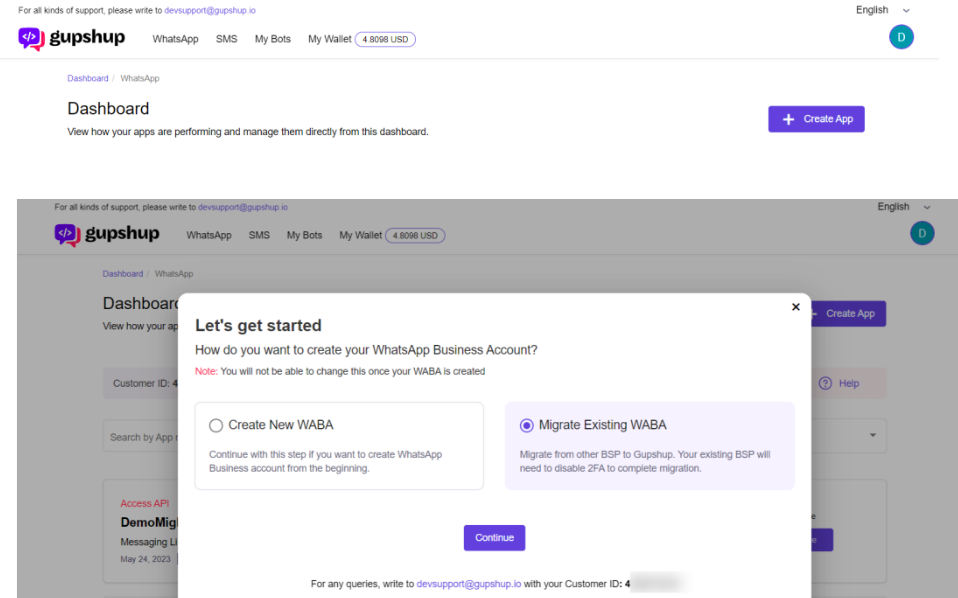
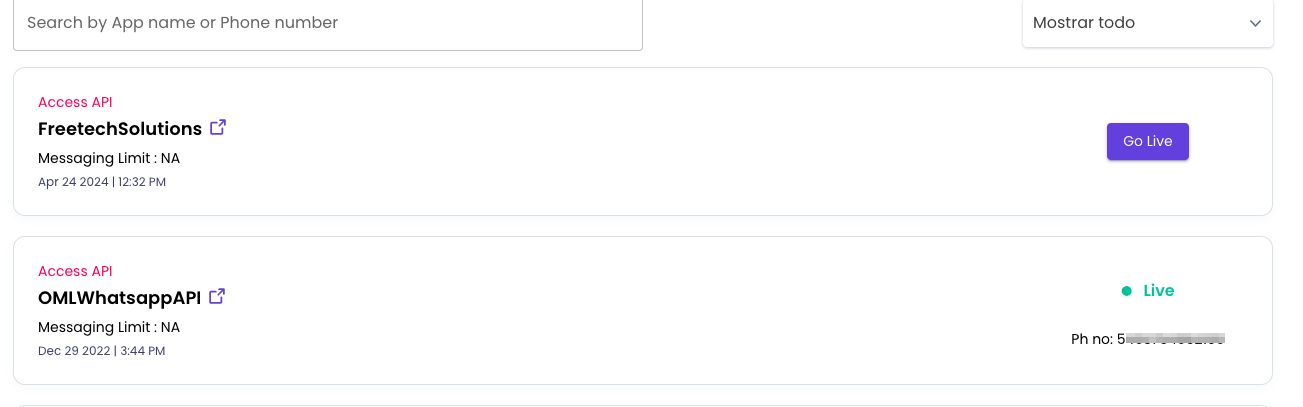
Step 2: Once listed in the Dashboard, click on "Go Live" to go through the WABA (Whatsapp Business Account) creation wizard. In our case, we will select an existing Whatsapp Business account by clicking on "Migrate Existing WABA":
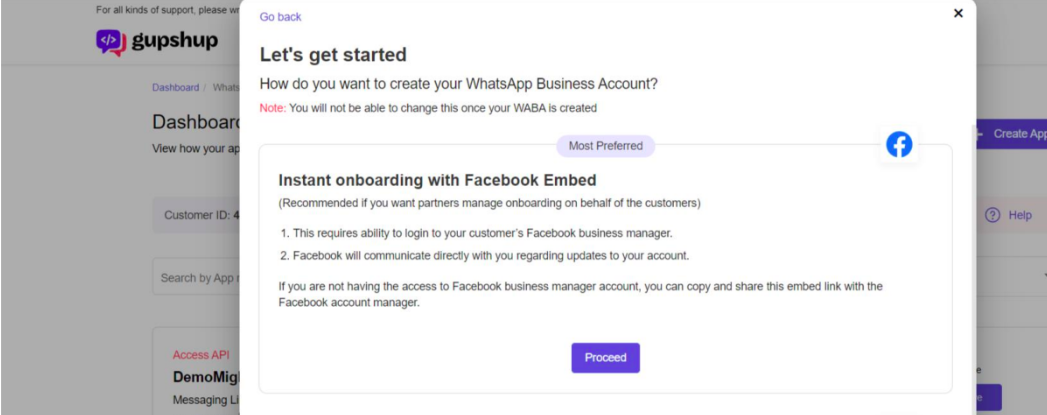
Step 3: Here you proceed to link the WhatsApp Business account with Facebook Business Manager. If the user has the access credentials to Facebook Business Manager, they can use the direct method (Facebook Embed):
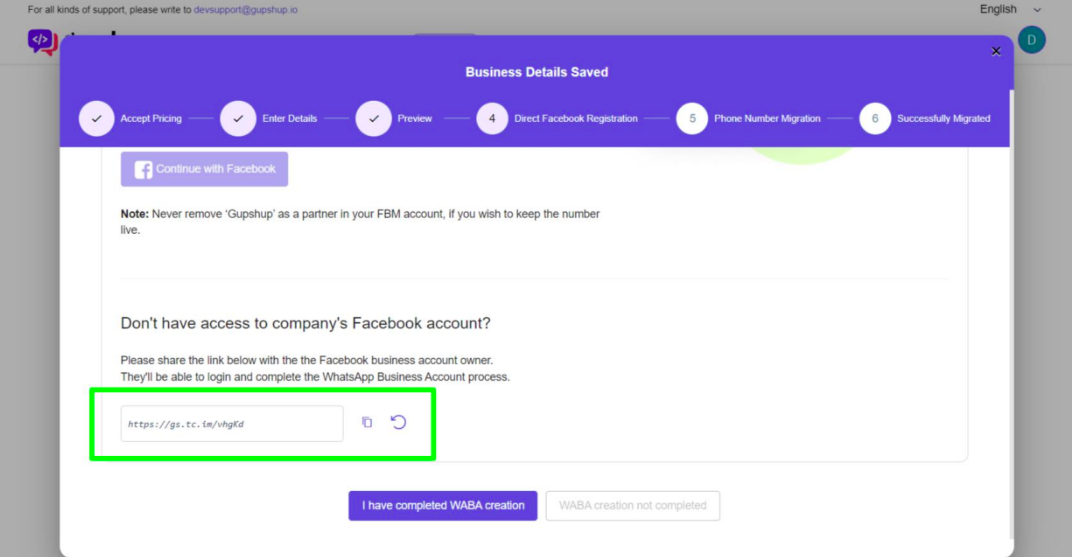
If you are not the Facebook Business Manager account administrator, GupShup provides an option to share the URL with the Account Administrator for authorization:
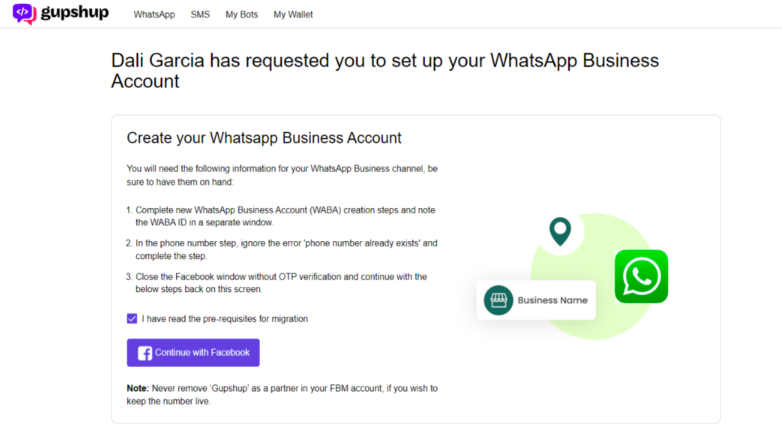
Using any of the mechanisms described in point 3, the user must access the Facebook Business Manager and make the link.
From Facebook Business Manager
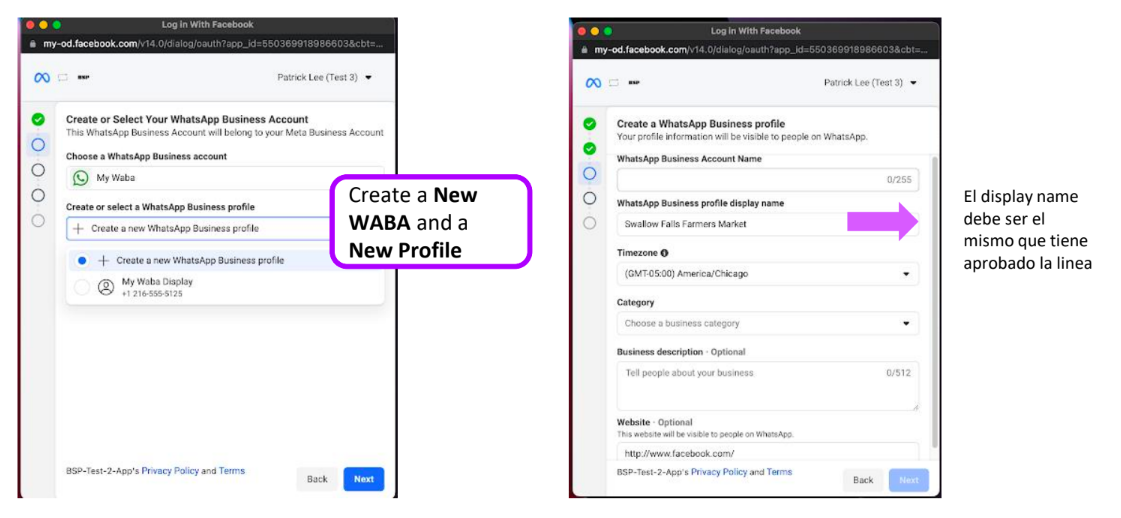
Step 4: Within Facebook Business Manager, create a New WABA (Whatsapp Business Account) and New Profile:
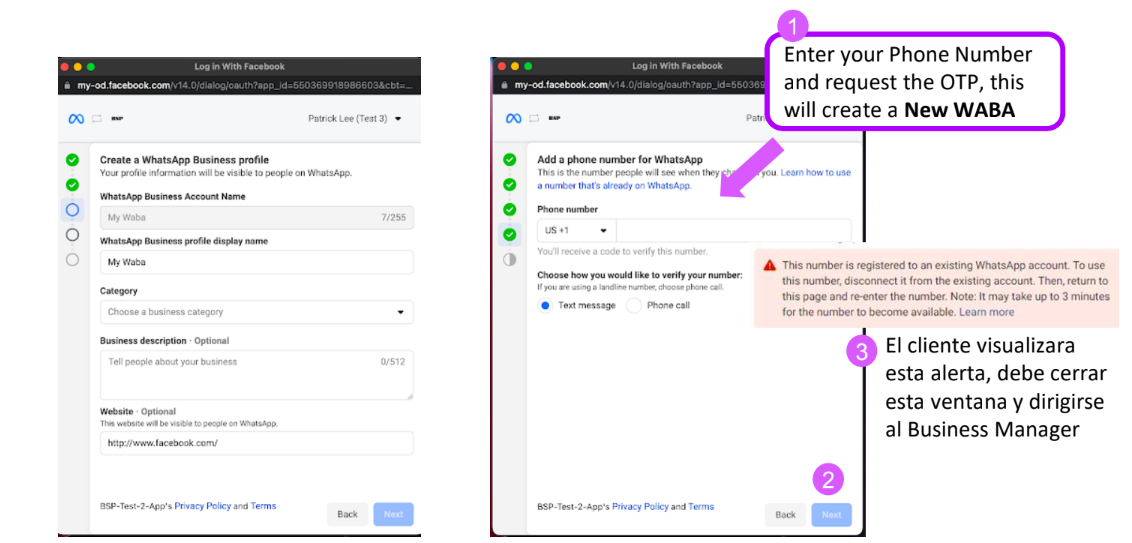
Step 5: Enter the WhatsApp phone number from which the new WABA will be created.
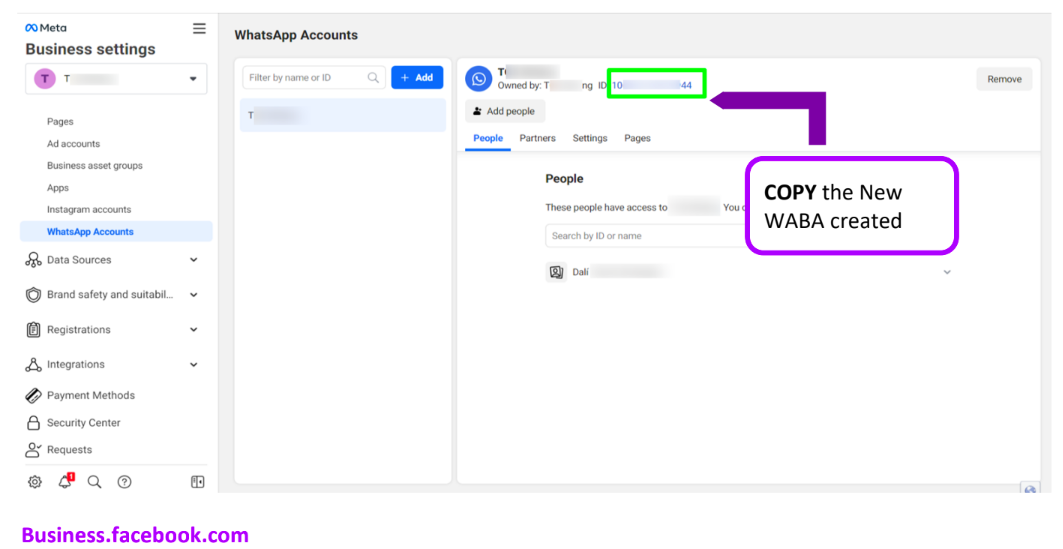
Step 6: Finally, copy the WABA ID once generated, to insert it into the GupShup Portal:
Back to GupShup Wizard
Step 7: Returning to GupShup, click on "I have completed the creation of WABA" and enter the WABA copied in the previous step:

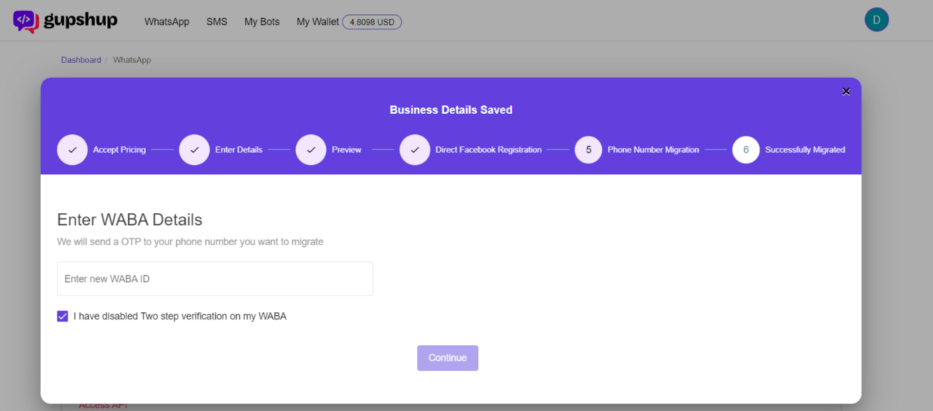
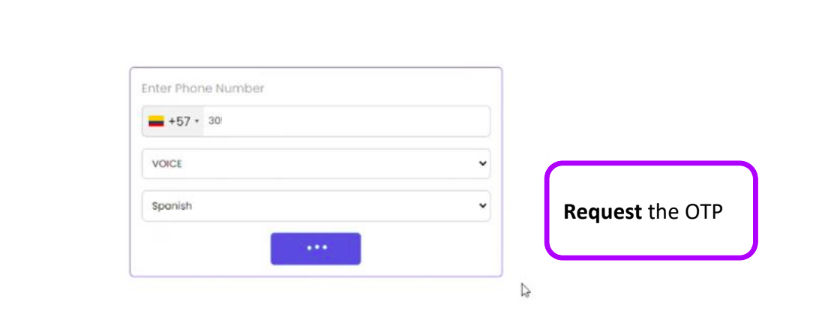
Step 8: To verify the WhatsApp Business phone number, Meta establishes an OTP (ON-Time-Password) mechanism through which it verifies its validity:
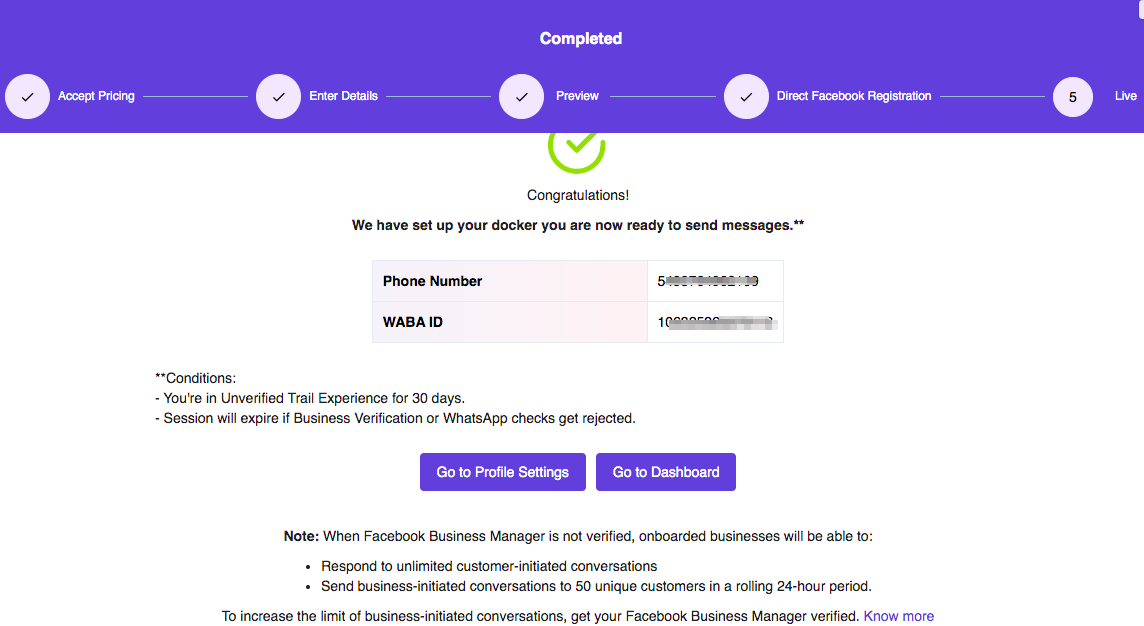
Step 9: Finally, the process of linking WhatsApp Business and Facebook Business Manager is complete. As soon as Meta approves the WABA account (1 to 2 business days according to documentation), GupShup will reflect its "live" status within its Dashboard and it is now possible to use Meta's APIs safely:
Whatsapp Webhook Configuration
In order for WhatsApp messages to successfully reach the OMniLeads instance, it is important to configure the Callback URL (Webhook) address where events will be listened to.
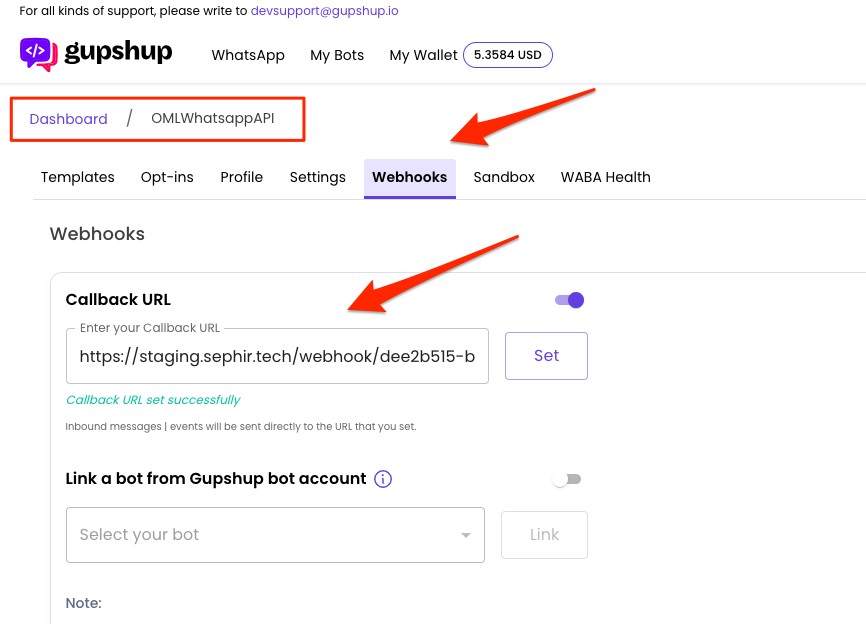
To do this, within the GupShup Dashboard, click on the Application that we have instantiated to handle Whatsapp Business events (in the example, "OMLWhatsappAPI") and access the Webhooks tab, where we proceed to set the Callback URL with the following format:
Where OMniLeads_FQDN is the Domain Name reachable on the Internet, and AppID is the Identifier obtained in the Application details (step 1 of this Wizard).
And that's it! We are now ready to forward incoming messages to OMniLeads. In the next section we will cover the components needed to register Suppliers and Lines.
Last updated